
Velvet cake originated in the 1950s as a softer alternative to red velvet, using cocoa and buttermilk for a tender crumb. Over time, bakers embraced darker hues for festive occasions, especially Halloween, where the midnight hue adds a dramatic visual cue. The tradition of layering with a glossy dark buttercream stems from classic French pâtisserie, bringing a luxurious mouthfeel that complements the holiday’s mysterious atmosphere.
Why You'll Love It
-
- Deep cocoa flavor that stays moist for days
-
- Easy-to‑make frosting that glistens like midnight
-
- Versatile décor options for any Halloween theme
-
- Makes a stunning centerpiece with minimal effort
"The black velvet cake stole the show—every bite felt like a silky nightfall, and the frosting was pure decadence!"
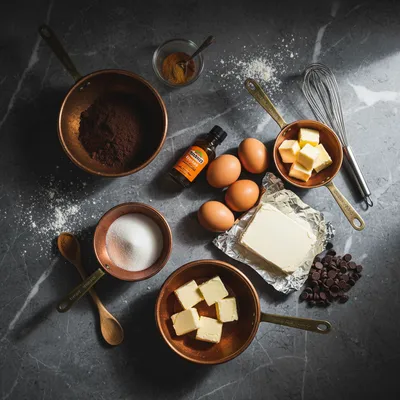
Essential Ingredient Guide
- Unsweetened cocoa powder: Choose a high‑quality Dutch‑process cocoa for the richest color and flavor.
- Buttermilk: Provides acidity that tenderizes the crumb and adds that classic velvet tang.
- Dark buttercream: Made with butter and cocoa, it creates a smooth, glossy finish that shines under candlelight.
- Vanilla extract: A small splash balances the chocolate bitterness with subtle warmth.
- Black food coloring: A few drops give the cake its midnight hue without altering taste.
- Granulated sugar: Ensures the cake stays sweet yet not cloying, perfect for a night‑time dessert.
 Breakfast & Brunch
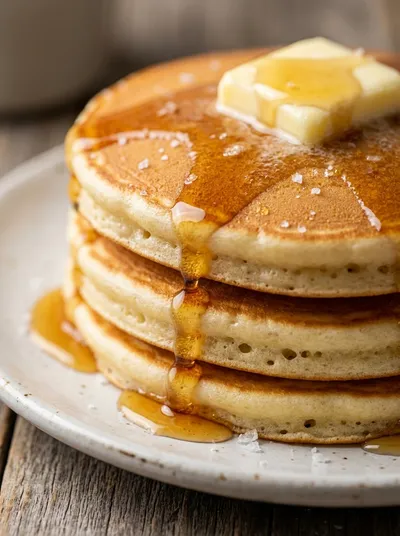
American Pancakes – Fluffy Breakfast Treat
Light, airy pancakes that drift like clouds on a plate, ideal for a relaxed morning.
Complete Cooking Process
-
Ingredient Readiness:
Sift dry ingredients, measure butter and buttermilk to room temperature, and pre‑heat the oven to ensure even rising.
-
Flavor Development:
Cream butter and sugar, then fold in cocoa and color, letting the aromas meld before adding wet ingredients.
-
Texture Control:
Mix just until combined; over‑mixing would toughen the crumb, leaving the cake dense instead of airy.
-
Finishing Touches:
Pipe dark buttercream, drizzle with a hint of chocolate ganache, and garnish with candy spiders or edible glitter.
-
Serving Timing:
Allow the cake to rest at room temperature for 20 minutes; the frosting softens and flavors settle.
-
Use parchment rounds for easy removal without damaging the layers.
-
Chill the butter for the frosting just long enough to stay soft for piping.
-
Add a pinch of espresso powder to intensify chocolate flavor without tasting coffee.
-
Store leftovers in an airtight container with a slice of bread to retain moisture.
Pro Tips
Honestly, these little adjustments make a world of difference. I remember the first time I tried the espresso trick—it turned a good cake into something unforgettable. So, take a breath, follow each step, and let the kitchen fill with that comforting, dark‑chocolate scent.
 Breakfast & Brunch
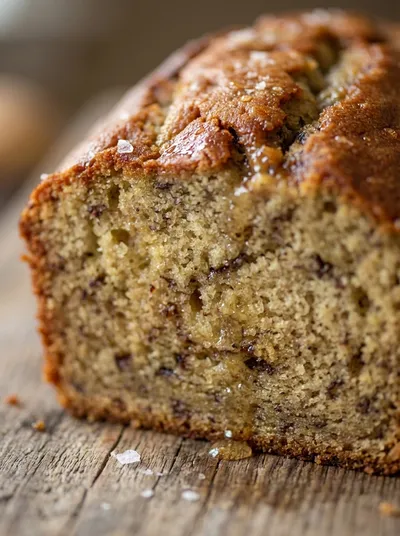
Classic Moist Banana Bread Recipe
Moist classic banana bread, ideal for a comforting breakfast or afternoon treat.
The essence of the dish:
A velvety crumb that melts on the tongue, wrapped in a silky, dark buttercream that reflects candlelight—perfect for a night of flickering shadows.
A fun fact or historical angle:
Velvet cakes were originally dyed red for Southern celebrations; the black version emerged in the 1970s as a playful homage to Halloween.
Flavor or sensory focus:
Expect a gentle bitterness from cocoa, softened by sweet buttercream, with a faint whisper of vanilla that lingers after each bite.
You Must Know
-
Careful folding preserves air pockets
-
Room‑temperature ingredients ensure a smooth batter
-
Chill frosting for clean piping lines
Frequently Asked Questions
→ Can I make this cake gluten‑free?
Yes, substitute the all‑purpose flour with a 1‑to‑1 gluten‑free blend and add a tablespoon of xanthan gum for structure.
→ How long does the cake stay fresh?
Stored in an airtight container at room temperature, it remains moist for up to four days.
→ What can I use instead of black food coloring?
Activated charcoal or natural beet powder gives a deep hue without artificial dyes.
→ Is this cake suitable for vegans?
Swap butter for vegan margarine, use plant‑based milk and a flax‑egg mixture; the texture stays delightfully soft.
→ Do I need special pans?
Two 8‑inch round cake pans work perfectly; just line them with parchment for easy release.
→ Can I add a filling?
A layer of raspberry jam or chocolate ganache adds a pleasant surprise in the center.
Nutrition Facts
per serving
420
Calories
5g
Protein
50g
Carbs
22g
Fat
Taste Profile
Rich, chocolate‑forward with a subtle buttery finish
Ingredient Substitutions
Don't have an ingredient? Try these alternatives
Add 1 tsp xanthan gum if the blend lacks it.
Ensure it’s soft, not melted, for proper creaming.
Recipe Variations
Try these delicious twists on the original
Spooky Oreo Crunch
Fold crushed Oreo cookies into the frosting and top with gummy eyeballs for extra fun.
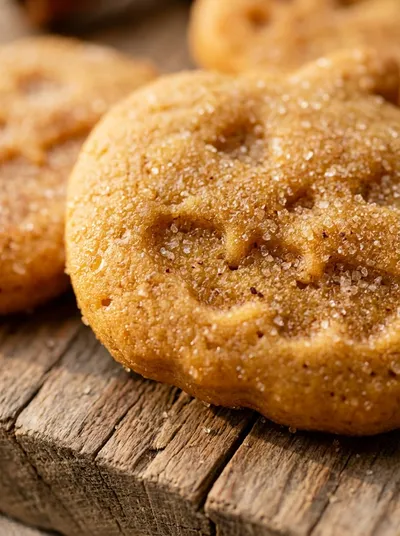
Pumpkin Spice Twist
Add 1 tsp pumpkin spice to the batter and garnish with candied pumpkin seeds.
Common Mistakes to Avoid
Learn from others' mistakes for perfect results
- Over‑mixing the batter, which creates a dense texture.
- Using cold butter for frosting, resulting in a grainy finish.
- Skipping the crumb coat, which can cause frosting to slide.
Meal Prep & Storage
Make Ahead Tips
You can bake and freeze the cake layers up to a month ahead; thaw and frost when ready to serve.
Leftover Ideas
Reheat a slice gently in the microwave for 15 seconds to revive softness.
Perfect Pairings
Serve this with...
Cooking Timeline
Gather and measure all ingredients; preheat the oven.
Cream butter and sugar, then add eggs one at a time.
Combine dry and wet ingredients, fold in color and espresso.
Pour batter into pans and bake; let cakes cool.
Prepare frosting, crumb‑coat cake, chill, then frost and decorate.

Black Velvet Halloween Cake
A luxuriously moist black velvet cake that whispers of chocolate depth and Halloween magic, layered with a silky dark buttercream and crowned with spooky décor.
Timing
Prep Time
30 Minutes
Cook Time
35 Minutes
Total Time
1 Hour 10 Minutes
Recipe Details
Ingredients
Cake
-
01
2 1/2 cups all‑purpose flour
-
02
3/4 cup unsweetened cocoa powder
-
03
1 1/2 tsp baking soda
-
04
1 tsp salt
-
05
1 cup unsalted butter, softened
-
06
1 1/2 cups granulated sugar
-
07
4 large eggs, room temperature
-
08
1 cup buttermilk
-
09
2 tsp vanilla extract
-
10
2 tbsp black food coloring
-
11
1 tsp espresso powder (optional)
Dark Buttercream Frosting
-
01
1 cup unsalted butter, softened
-
02
3 cups confectioners' sugar, sifted
-
03
1/2 cup unsweetened cocoa powder
-
04
2 tbsp heavy cream
-
05
1 tsp vanilla extract
-
06
A pinch of salt
-
07
Black food coloring, as needed
Instructions
Preheat the oven to 350°F (175°C). Grease two 8‑inch round pans, line with parchment, and set aside.
In a bowl whisk together flour, cocoa, baking soda, and salt; set aside.
Cream butter and sugar on medium speed until light and fluffy, about 3‑4 minutes. Add eggs one at a time, mixing well after each.
Stir in vanilla, food coloring, and espresso powder. Alternate adding dry ingredients and buttermilk, beginning and ending with the dry mixture. Mix just until combined.
Divide batter evenly between pans and bake for 30‑35 minutes, or until a toothpick comes out clean. Let cakes cool in pans for 10 minutes, then turn onto a wire rack to cool completely.
While cakes cool, make the frosting: beat butter until creamy, then gradually add powdered sugar and cocoa, beating on low. Add heavy cream, vanilla, and salt, then increase speed to high and whip until light. Adjust color with a few drops of black food coloring.
Level the cake layers, spread a thin crumb coat of frosting, chill for 15 minutes, then frost the top and sides generously. Decorate with chocolate shards, candy spiders, or a drizzle of dark chocolate ganache.
Serve at room temperature and enjoy the deep, velvety flavors that echo the quiet of a Halloween night.
Notes & Tips
-
1
If the batter looks too thick, add a tablespoon of milk to loosen it.
-
2
For extra shine, brush the top with a thin layer of simple syrup before frosting.
-
3
Allow the frosting to rest at room temperature for easier spreading.
 Desserts
No-Bake Cheesecake Bites: Easy Recipe
A quick, creamy no‑bake cheesecake bite perfect for any occasion.
Tools You'll Need
-
Two 8‑inch round cake pans
-
Parchment paper
-
Electric mixer
-
Spatula
-
Sifter
-
Cooling rack
-
Piping bag (optional)
Must-Know Tips
-
Don't over‑mix the batter, it can make the cake dense.
-
Let the butter soften, not melt, for a smooth frosting.
-
Use a cake leveler or serrated knife for even layers.
Professional Secrets
-
Room temperature ingredients ensure even emulsification.
-
Sift cocoa with flour to prevent lumps.
-
Chill the crumb‑coated cake briefly to lock in structure.

Recipe by
Sofia☕💖 A morning coffee lover who can’t resist melting chocolate into everything she bakes. Warm smiles and cocoa dreams! 🍩🌷
Get Delicious Recipes Weekly
Join 25,000+ home cooks getting our best recipes straight to their inbox.
Free forever • No spam • Unsubscribe anytime