
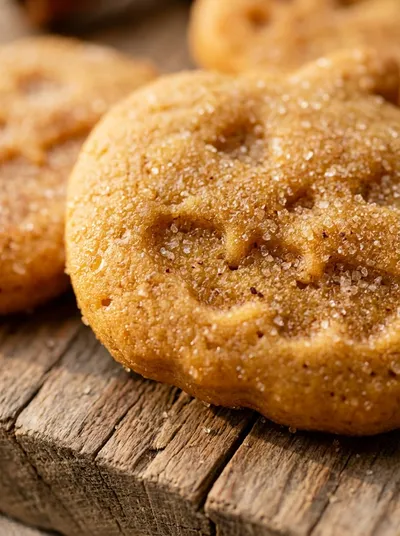
The tradition of the chocolate chip cookie is a relatively modern American classic, born from a happy accident in the 1930s. While individual cookies are the gold standard, the transition to chewy chocolate chip cookie bars reflects a shift toward communal, family-style baking that prioritized ease and shared enjoyment over precision.
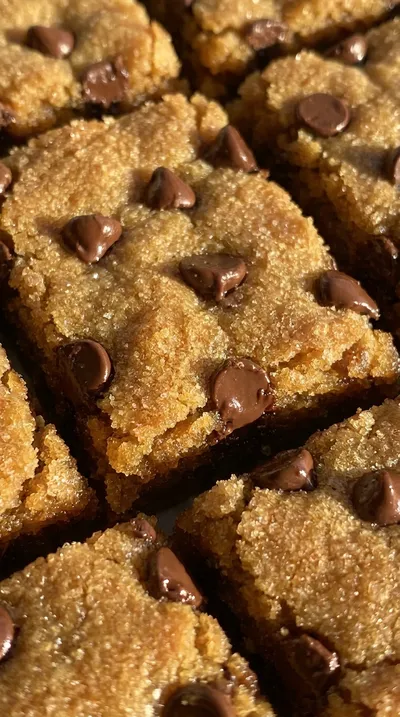
These bars utilize the classic chemistry of all-purpose flour, baking soda, and salt to create a structure that is denser and moister than a standard cookie. By baking them in a single pan, the moisture from the eggs and melted butter is trapped more effectively, resulting in that signature chewy texture that lingers on the palate.
Culturally, the 'bar' format turned a delicate dessert into a hearty treat suitable for potlucks and school bake sales. It transformed a precise art into a rustic gesture of kindness, where the focus is on the abundance of semi-sweet chocolate chips and the warmth of the oven rather than the perfection of a circle.
Today, this style of baking remains a staple of home comfort, bridging the gap between a cake and a cookie. It is a reflective nod to a time when the simplest ingredients—like pure vanilla extract and brown sugar—were enough to bring a whole room together.
Why You'll Love It
-
- Honestly, there is just something so grounding about a pan of these, and the way they stay soft and chewy reminds me of the treats I used to make for school bake sales.
-
- Well, look, using a 9x13 inch baking pan makes everything so much easier than scooping individual cookies, so you can just relax and enjoy the process.
-
- I mean, the smell of melted butter and vanilla filling the kitchen is just pure comfort, especially when those semi-sweet chocolate chips start to melt.
-
- Dang, they really are the ultimate treat—buttery, sweet, and just the right amount of gooey in the center to make you feel like a kid again.
"Honestly, these are the softest bars I've ever made. My grandkids practically flew into the kitchen the moment they smelled the butter!"
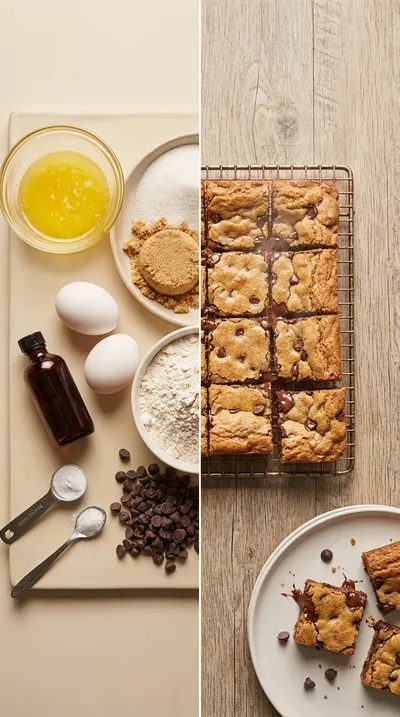
Essential Ingredient Guide
- 1 cup (2 sticks) unsalted butter, melted: Using melted butter is the secret here, really. It gives the bars that wonderful, dense chewiness that I just adore.
- 2 cups semi-sweet chocolate chips: I always make sure these are evenly stirred in. They create these little pockets of melted joy in every single bite.
- 1 teaspoon pure vanilla extract: A little bit of good vanilla goes a long way. It adds that warm, floral note that ties the sugar and butter together so beautifully.
- 1 teaspoon salt: Don't skip the salt, now. It balances out all that sweetness so the bars don't taste too heavy.
- 1 teaspoon baking soda: This gives the bars just a tiny bit of lift. It keeps them from becoming too flat, though we still want that chewy texture.
- 1 1/2 cups granulated sugar and 3/4 cup packed light brown sugar: Using both types of sugar is key. The brown sugar adds a lovely molasses depth, while the granulated sugar helps with the edges.
Complete Cooking Process
-
Getting Ready:
I like to have my 1 cup (2 sticks) unsalted butter, melted and slightly cooled, and my eggs ready to go. Lining the pan with parchment paper is a must, or you'll be fighting with the bars later.
-
Building the Flavor:
The magic happens when you beat the sugars into that melted butter for a few minutes. It creates a rich, fluffy base that carries the vanilla and eggs perfectly.
-
Managing the Texture:
The most important part is when you add the 2 1/4 cups all-purpose flour. Just mix it until it's combined; if you overdo it, you'll lose that softness and the bars will get tough.
-
The Final Fold:
Using a rubber spatula to fold in the 2 cups semi-sweet chocolate chips is so satisfying. Just a few gentle turns and you've got chocolate everywhere.
-
The Patient Wait:
The hardest part is letting them cool completely in the pan. If you rush it, they might crumble, but waiting ensures those clean, perfect squares.
-
Keep your melted butter slightly warm, not hot, to help those sugars spread for a chewier edge.
-
Watch your oven closely—pull them out when the edges are golden but the center still has a few moist crumbs.
-
Avoid overmixing the flour to keep the bars tender and soft.
-
Use a sharp, warm knife to get those clean, professional-looking cuts.
Pro Tips
You've got this, just trust your instincts and your nose!
 Desserts
No-Bake Cheesecake Bites: Easy Recipe
A quick, creamy no‑bake cheesecake bite perfect for any occasion.
Better For You Treats
Now, I won't pretend these are a health food, since they're high in sugar and fat. But I believe in balance—enjoying a small square as a mindful treat is just a lovely way to care for your soul.
Ways to Make it Your Own
If you're feeling adventurous, you could stir in 1/2 cup of creamy peanut butter with the butter and sugars. Or, ugh, my favorite—drizzle some caramel sauce and flaky sea salt on top after they bake.
Serving Suggestions
I personally love these served warm with a tall, cold glass of milk. If you're feeling fancy, a scoop of vanilla ice cream on top makes it feel like a real occasion.
Frequently Asked Questions
→ Can I use a different size pan?
I really recommend sticking with the 9x13 inch baking pan. If you use a smaller one, they'll be too thick and won't bake evenly in the middle.
→ How do I know when they are actually done?
Look for those golden brown edges! A toothpick should come out with a few moist crumbs—if it's completely clean, you've overbaked them.
→ Do these actually freeze well?
Oh, they do! Just wrap the individual bars in plastic wrap and pop them in a freezer bag; they stay wonderful for up to 2 months.
Nutrition Facts
per serving
280
Calories
4g
Protein
32g
Carbs
14g
Fat
Taste Profile
A classic, rich buttery sweetness with deep notes of chocolate.
Ingredient Substitutions
Don't have an ingredient? Try these alternatives
Gives a more intense, less sweet chocolate flavor
Reduce the added salt by 1/4 teaspoon
Recipe Variations
Try these delicious twists on the original
Peanut Butter Chocolate Chip Bars
Well, for a nutty twist, just add 1/2 cup of creamy peanut butter to the wet ingredients along with your butter and sugars. It's just a delicious match for the chocolate.
Salted Caramel Chocolate Chip Bars
If you like that sweet and salty thing, drizzle the baked bars with caramel sauce and a pinch of flaky sea salt before they cool completely. Wow, just irresistible!
Common Mistakes to Avoid
Learn from others' mistakes for perfect results
- Overmixing the batter, which makes the bars tough instead of chewy
- Overbaking, which removes the soft center we're looking for
- Removing the bars from the pan while still hot, causing them to crumble
Meal Prep & Storage
Make Ahead Tips
You can certainly bake these in advance and store them in an airtight container for 3 days, or freeze them for up to 2 months for a quick treat later.
Leftover Ideas
Any remaining bars can be kept at room temperature in a sealed container; just pop one in the microwave for 10 seconds to get that fresh-baked feel.
Perfect Pairings
Serve this with...
Cooking Timeline
Preheat oven and line the baking pan with parchment
Cream butter and sugars, then mix in eggs and vanilla
Whisk dry ingredients and fold them into the wet batter with chocolate chips
Spread batter in pan and bake for 25-30 minutes
Cool completely on a wire rack before cutting into squares
 Pasta
Pasta
Perfect Pasta Salad Dressing Recipe
A quick, lemon‑garlic vinaigrette that elevates pasta salads with a burst of freshness.
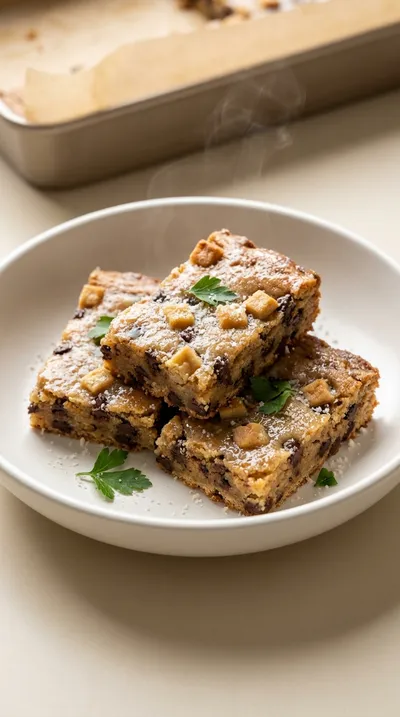
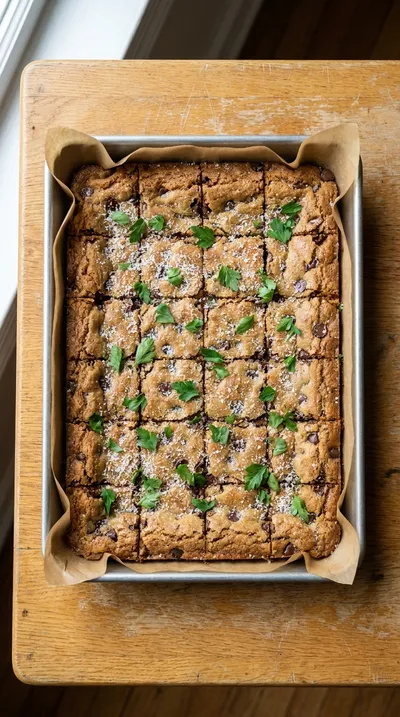
Chewy Chocolate Chip Cookie Bars
Warm your kitchen with the smell of melted butter and vanilla. These chewy chocolate chip cookie bars are soft, buttery, and just the right amount of sweet for a quiet afternoon.
Timing
Prep Time
15 Minutes
Cook Time
25-30 Minutes
Total Time
40-45 Minutes
Recipe Details
Ingredients
Main Ingredients
-
01
1 cup (2 sticks) unsalted butter, melted
-
02
1 1/2 cups granulated sugar
-
03
3/4 cup packed light brown sugar
-
04
2 large eggs
-
05
1 teaspoon pure vanilla extract
-
06
2 1/4 cups all-purpose flour
-
07
1 teaspoon baking soda
-
08
1 teaspoon salt
-
09
2 cups semi-sweet chocolate chips
Instructions
First things first, go ahead and preheat your oven to 350°F (175°C). I always line my 9x13 inch baking pan with parchment paper, and here is a little trick: leave an overhang on the sides. It makes it so much easier to lift the bars out later without any fuss.
In a large mixing bowl, bring together your melted butter, granulated sugar, and brown sugar. Use your electric mixer on medium speed and beat them until they're well combined and just a bit fluffy. Usually takes about 2-3 minutes, honestly.
Now, beat in those eggs one at a time—don't rush it—and then stir in the vanilla extract. I like to make sure everything is thoroughly mixed so the flavor is just right.
In a separate bowl, just whisk together the flour, baking soda, and salt. It seems simple, but it really helps ensure the leavening agent and salt are spread evenly through the dough.
Gradually add your dry ingredients into the wet ones, mixing on low speed until they're just combined. Look, be careful not to overmix here; if you do, the bars can get a bit tough, and we want them chewy.
Gently stir in the semi-sweet chocolate chips until they're evenly distributed. I've found a rubber spatula works best for this part, just folding them in with love.
Pour that lovely batter into your prepared pan and spread it out evenly with your spatula. Make sure you push it right into the corners so every single piece bakes consistently.
Bake for 25-30 minutes. You're looking for edges that are golden brown and a toothpick in the center that comes out with a few moist crumbs. Just a heads up, baking times can vary, so keep a close eye on them.
Now comes the hard part: let the bars cool completely in the pan on a wire rack. Once they're cool, use that parchment paper overhang to lift them out. This is just crucial, otherwise they might crumble.
Cut them into squares and you're done! I suggest using a sharp, warm knife to get those nice, clean cuts we all love.
Notes & Tips
-
1
Allow the bars to cool completely before removing from the pan to prevent crumbling
-
2
Use parchment paper with an overhang for easy removal
-
3
Avoid overmixing the batter to keep the bars soft and chewy
 Desserts
Caramel Ribbon Crunch Frappuccino Recipe
Creamy caramel frappuccino with ribbon swirls and a delightful crunch, ideal for a mid‑day treat.
Tools You'll Need
-
9x13 inch baking pan for the perfect rectangle
-
Parchment paper to stop any sticking
-
Large mixing bowl for combining ingredients
-
Electric mixer, either handheld or a stand mixer
-
Measuring cups and spoons for accuracy
-
Rubber spatula for gentle folding
Must-Know Tips
-
Butter Temperature, Use slightly melted butter (but not hot) to create those wonderfully chewy edges
-
Don't Overbake, Slightly underbaked bars are chewier; look for golden edges and moist crumbs
-
Chocolate Variety, For a richer flavor, try using dark chocolate chips or a mix of semi-sweet and dark
Professional Secrets
-
The secret to the texture is in the butter; slightly melted butter helps the sugars spread for a better chew
-
Preventing toughness by mixing dry ingredients on low speed and stopping as soon as they are combined
-
Using a warm, sharp knife ensures a clean professional cut without tearing the soft center
What readers are saying
Community reviews from home cooks like you
Will definitely make this again. I really liked how the 1 cup (2 sticks) unsalted butter, melted and 1 1/2 cups granulated sugar came together. The texture was a touch off, but the flavor saved it. Will be making this regularly.
I was surprised how good this turned out. I really liked how the 1 cup (2 sticks) unsalted butter, melted and 1 1/2 cups granulated sugar came together. It took slightly longer than the recipe said. Thanks for sharing this one!
Will definitely make this again. I really liked how the 1 cup (2 sticks) unsalted butter, melted and 1 1/2 cups granulated sugar came together. I added a bit more seasoning next time. My kids even asked for seconds.
This was a hit with my family. I really liked how the 1 cup (2 sticks) unsalted butter, melted and 1 1/2 cups granulated sugar came together. I added a bit more seasoning next time. Great addition to my recipe rotation.
Perfect for a busy weeknight. I really liked how the 1 cup (2 sticks) unsalted butter, melted and 1 1/2 cups granulated sugar came together. I added a bit more seasoning next time. Will be making this regularly.
This exceeded my expectations. I really liked how the 1 cup (2 sticks) unsalted butter, melted and 1 1/2 cups granulated sugar came together. My kids even asked for seconds.
The flavors were spot on. I really liked how the 1 cup (2 sticks) unsalted butter, melted and 1 1/2 cups granulated sugar came together. Already shared it with a friend.
Good, but not amazing. The melted flavor was nice, but i added a bit more seasoning next time. I might try it again with some adjustments.
+ 4 more community reviews

Recipe by
Sofia☕💖 A morning coffee lover who can’t resist melting chocolate into everything she bakes. Warm smiles and cocoa dreams! 🍩🌷
Get Delicious Recipes Weekly
Join 25,000+ home cooks getting our best recipes straight to their inbox.
Free forever • No spam • Unsubscribe anytime