
Chocolate has a long, sweet history that stretches from ancient Mesoamerican cacao beans to the modern kitchen table. The combination of dense brownie and light mousse was popularized in the early 2000s as a way to make a richer dessert without overwhelming the palate. I remember the first time I served this to my grandchildren; their eyes widened at the glossy top, and they whispered, "wow, that looks like a chocolate dream." The recipe honors that tradition while keeping it simple enough for a home cook to pull off without fuss.
Why You'll Love It
-
- Perfect balance of fudgy and airy textures
-
- Simple pantry ingredients, no fancy equipment
-
- Refreshing chocolate flavor that isn’t too sweet
-
- Makes a beautiful presentation for gatherings
"These mousse brownies are the perfect mix of comfort and elegance—my guests can’t get enough!"
Essential Ingredient Guide
- Dark chocolate: Choose a 70% cacao bar for depth; melt slowly to keep the flavor bright
- Heavy cream: Room‑temperature cream whips more easily and gives the mousse its silkiness
- Granulated sugar: Adds sweetness without clouding the chocolate’s bitter notes
- Eggs: Whisked into the brownie mix for lift; if you prefer, you can substitute with a flax‑egg
- Cocoa powder: A deep, unsweetened cocoa brings a robust profile to the brownie base
- Vanilla extract: Just a splash brightens the overall aroma, like a quiet sunrise in the kitchen
Complete Cooking Process
-
Ingredient Readiness:
Measure all dry goods, melt chocolate, and chill the cream before you start. This helps the mousse stay airy.
-
Flavor Development:
Sauté a pinch of salt with cocoa for the brownie, then fold in melted chocolate for a richer base.
-
Texture Control:
Whip the cream until soft peaks form, then gently fold into the chocolate mixture to keep it light.
-
Finishing Touches:
Spread the brownie batter, swirl the mousse on top, and dust with a whisper of powdered sugar.
-
Serving Timing:
Let the brownies chill for at least an hour; they taste best when the mousse has set but the brownie stays moist.
-
Use a heat‑proof bowl over simmering water to melt chocolate without scorching
-
Do not over‑whip the cream; a few soft peaks keep the mousse silky
-
Cool the brownie layer slightly before adding the mousse to avoid melting
Pro Tips
I’ve found that letting the dessert rest a little longer, about 90 minutes, lets the flavors settle and the texture firm up just right. Ugh, sometimes I’m impatient, but the wait is worth the gentle sigh of chocolate that follows.
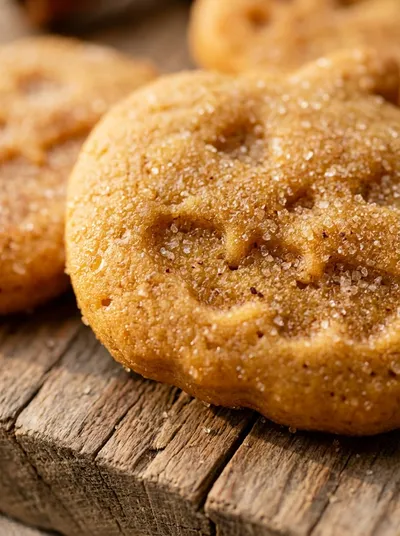
 Desserts
No-Bake Cheesecake Bites: Easy Recipe
A quick, creamy no‑bake cheesecake bite perfect for any occasion.
The essence of the dish:
It’s the marriage of two classic chocolate experiences – the dense, fudgy comfort of a brownie and the lofty, melt‑in‑your‑mouth lightness of mousse. The contrast creates a dance on the palate that feels both familiar and surprisingly new.
A fun fact or historical angle:
When brownies first emerged in the United States at the turn of the 20th century, they were often called "cocoa squares," a nod to their simple, chocolatey roots.
Flavor or sensory focus:
You’ll notice the deep, slightly bitter cocoa first, then a smooth, buttery melt that carries a faint vanilla perfume, all balanced by a subtle hint of sea salt.
You Must Know
-
Do not over‑mix the batter – it can make the brownies tough
-
Temper the chocolate to avoid grainy texture
-
Cool the brownie layer before swirling the mousse
Frequently Asked Questions
→ Can I make this recipe gluten‑free?
Yes – substitute the all‑purpose flour with an equal amount of a gluten‑free blend and the texture will remain tender.
→ What if I don’t have heavy cream?
You can use chilled coconut cream for a dairy‑free version; it whips up similarly and adds a subtle tropical note.
→ How long can I store these brownies?
Keep them in an airtight container in the refrigerator for up to three days. They taste best when chilled.
→ Can I freeze the brownies?
Absolutely – wrap individual slices in plastic wrap and freeze for up to two months. Thaw in the fridge before serving.
→ Do I need to use a special pan?
A standard 8‑inch square pan works fine; just line it with parchment paper for easy removal.
→ What’s a good pairing for this dessert?
A glass of chilled sparkling wine or a simple espresso highlights the chocolate’s depth without overwhelming it.
Nutrition Facts
per serving
420
Calories
6g
Protein
38g
Carbs
28g
Fat
Taste Profile
Rich chocolate with a balanced sweetness and a hint of bitterness
Ingredient Substitutions
Don't have an ingredient? Try these alternatives
Will be sweeter and less bitter; adjust sugar accordingly
Gives a denser crumb and a nutty flavor; use slightly less
Recipe Variations
Try these delicious twists on the original
Spicy Version
Add a pinch of cayenne pepper and a drizzle of chocolate‑chili sauce for a subtle heat.
Nutty Crunch
Stir chopped toasted walnuts into the brownie batter for extra texture.
Common Mistakes to Avoid
Learn from others' mistakes for perfect results
- Over‑mixing the batter, which makes brownies tough.
- Adding mousse to a hot brownie layer, causing it to melt.
- Under‑whipping the cream, resulting in a dense mousse.
Meal Prep & Storage
Make Ahead Tips
You can bake the brownie layer a day ahead, then store it covered at room temperature. Whip the mousse the night before and keep it chilled; assemble just before serving.
Leftover Ideas
Reheat gently in a microwave for 10‑15 seconds if you prefer a warm brownie, or enjoy cold for a firmer mousse texture.
Perfect Pairings
Serve this with...
Cooking Timeline
Gather and measure all ingredients; line pan with parchment.
Melt butter and chocolate, whisk in sugar and eggs.
Combine dry ingredients, bake brownie base.
Prepare mousse while brownies cool; assemble and chill.
Refrigerate assembled brownies for at least 1 hour before slicing.
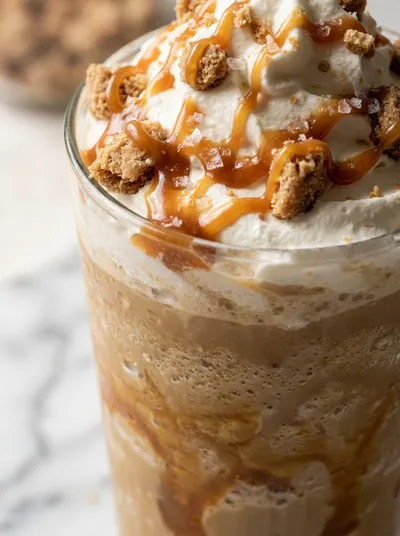 Desserts
Caramel Ribbon Crunch Frappuccino Recipe
Creamy caramel frappuccino with ribbon swirls and a delightful crunch, ideal for a mid‑day treat.
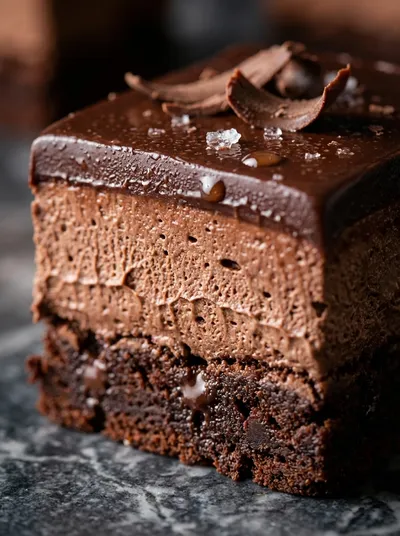
Chocolate Mousse Brownies – Creamy Decadent Dessert
Indulge in rich chocolate mousse brownies, a creamy, fudgy treat perfect for any sweet craving. This dessert balances the dense comfort of a brownie with the airy lightness of mousse, making every bite feel like a gentle sigh of chocolate bliss.
Timing
Prep Time
20 Minutes
Cook Time
25 Minutes
Total Time
45 Minutes
Recipe Details
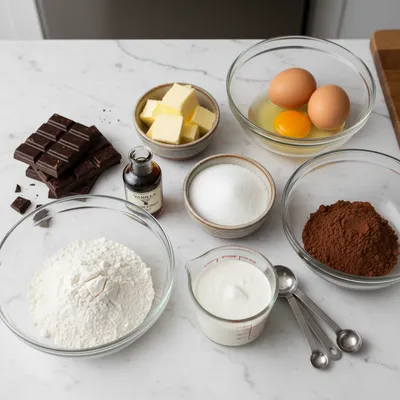
Ingredients
Brownie Base
-
01
1/2 cup unsalted butter, melted
-
02
8 oz dark chocolate, chopped
-
03
3/4 cup granulated sugar
-
04
2 large eggs
-
05
1/2 cup all‑purpose flour
-
06
1/4 cup cocoa powder
-
07
1/2 tsp sea salt
-
08
1 tsp vanilla extract
Chocolate Mousse
-
01
1 cup heavy cream, chilled
-
02
4 oz dark chocolate, finely grated
-
03
2 tbsp powdered sugar
-
04
1 tsp vanilla extract
Instructions
Preheat the oven to 350°F (175°C). Line an 8‑inch square pan with parchment paper.
In a heat‑proof bowl, melt the butter and dark chocolate together over simmering water, stirring gently until smooth; set aside to cool slightly.
Whisk sugar into the melted chocolate, then beat in the eggs one at a time until fully incorporated.
Sift flour, cocoa powder, and sea salt together; fold into the chocolate mixture until just combined. Pour the batter into the prepared pan and bake for 12‑15 minutes, until the top is set but the center still looks slightly fudgy.
While the brownies bake, prepare the mousse: place grated chocolate in a bowl, then pour over the warm (not hot) heavy cream. Let sit for a minute, then whisk until glossy and thick.
Add powdered sugar and vanilla to the mousse, whisking just until incorporated.
Allow the brownies to cool in the pan for 10 minutes, then spread the mousse over the warm brownie layer, smoothing the top with a spatula.
Refrigerate the assembled brownies for at least 1 hour, then cut into squares and serve. For a final touch, drizzle with a little melted chocolate or dust with cocoa.
Notes & Tips
-
1
If you prefer a less sweet mousse, reduce the powdered sugar by half.
-
2
For extra shine, glaze the top with a thin layer of melted chocolate just before chilling.
-
3
Allow the brownies to cool slightly before adding the mousse; this prevents the mousse from melting.
 Desserts
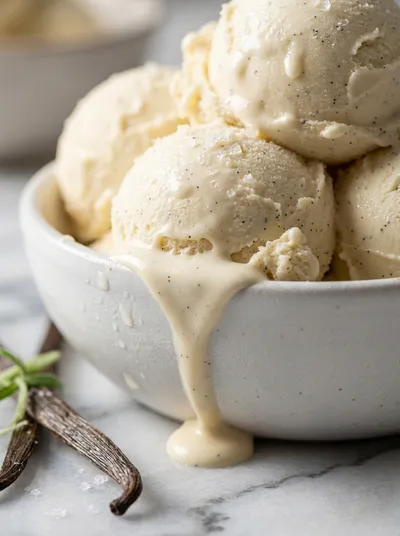
Vanilla Ice Cream – No‑Cook Homemade Treat
No‑cook vanilla ice cream that’s silky, sweet, and ready in minutes—perfect for an easy homemade treat.
Tools You'll Need
-
8‑inch square baking pan
-
Parchment paper
-
Heat‑proof mixing bowl
-
Whisk
-
Spatula
-
Electric mixer (optional)
-
Sharp knife
Must-Know Tips
-
Do not over‑mix the brownie batter; a few streaks are fine.
-
Whip the cream just to soft peaks to keep the mousse airy.
-
Cool the brownie layer before swirling the mousse to keep layers distinct.
Professional Secrets
-
Use a double boiler for melting chocolate; it prevents scorching and keeps the texture silky.
-
Room‑temperature butter mixes more evenly with the chocolate, creating a smoother base.
-
Slightly under‑bake the brownies; the residual heat finishes cooking while keeping the center moist.

Recipe by
Sofia☕💖 A morning coffee lover who can’t resist melting chocolate into everything she bakes. Warm smiles and cocoa dreams! 🍩🌷
Get Delicious Recipes Weekly
Join 25,000+ home cooks getting our best recipes straight to their inbox.
Free forever • No spam • Unsubscribe anytime