
Chocolate desserts have traveled from ancient Mesoamerican cacao rites to modern holiday tables, each era adding its own flourish. This particular recipe draws on a 19th‑century American tradition of molding chocolate into seasonal shapes, a practice that made festive gatherings feel a bit more magical. The story is simple and grounded, reflecting a time when families gathered around a warm kitchen, the air scented with cocoa and pine, and shared treats that felt both familiar and novel.
Why You'll Love It
-
- Simple shaping technique that anyone can master
-
- Rich cocoa flavor balanced by a light buttery snap
-
- Perfect bite‑size portion for holiday snacking
-
- Elegant yet playful presentation that fits any table
"These chocolate turkeys stole the show—my kids couldn't stop talking about the crunch!"
Essential Ingredient Guide
- Good quality dark chocolate: Choose 60‑70% cocoa for depth; melt gently to keep it glossy.
- Unsalted butter: Adds shine and a tender bite; melt with chocolate for a smooth blend.
- Granulated sugar: A touch of sweetness brightens the cocoa without overpowering.
- Vanilla extract: Just a splash gives a warm aromatic background.
- Sea salt flakes: A pinch on each turkey amplifies the chocolate flavor.
- Edible gold dust (optional): For a festive sparkle that catches the light.
 Breakfast & Brunch
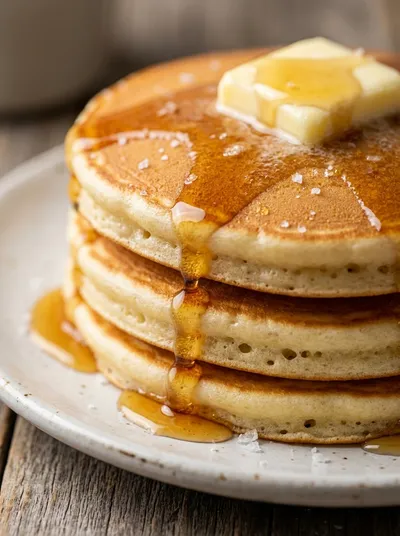
American Pancakes – Fluffy Breakfast Treat
Light, airy pancakes that drift like clouds on a plate, ideal for a relaxed morning.
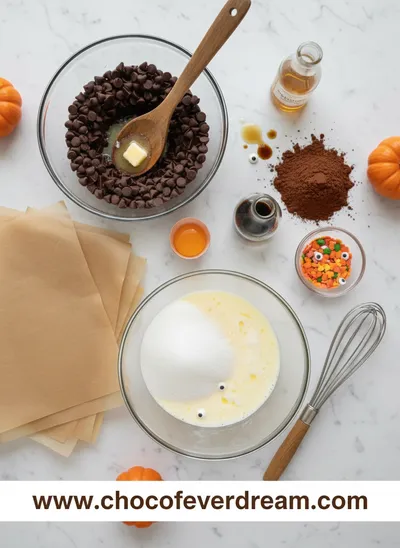
Complete Cooking Process
-
Ingredient Readiness:
Measure chocolate, butter, and sugar before you begin; pre‑heat a double boiler and have parchment ready.
-
Flavor Development:
Melt chocolate with butter over gentle heat; stir in sugar and vanilla until silky.
-
Texture Control:
Cool the mixture slightly, then pipe or pipe‑bag into turkey shapes; a brief chill sets the edges.
-
Finishing Touches:
Sprinkle sea salt and, if desired, gold dust just before the chocolate hardens completely.
-
Serving Timing:
Let the turkeys sit at room temperature for a few minutes before arranging on a platter; they taste best when the chocolate is just firm.
-
Use a silicone mat for easy release.
-
Work with chocolate below 115°F to avoid bloom.
-
Pipe with a small round tip for crisp edges.
-
Store in a single layer so they don’t stick together.
Pro Tips
When the turkeys are set, I often pause to admire the little shapes, recalling that gentle patience makes all the difference. It’s the kind of quiet moment that feels like a soft sigh of relief after a busy kitchen day, and it invites you to share the calm with anyone gathered around.
 Breakfast & Brunch
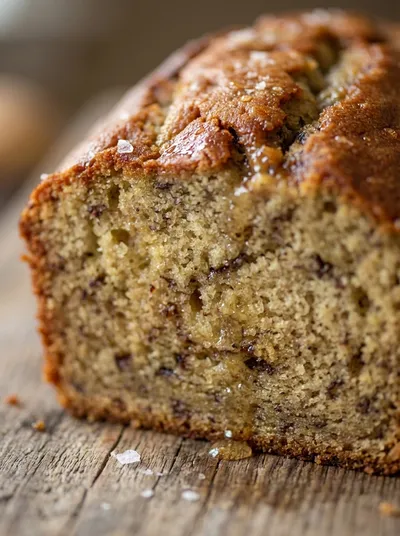
Classic Moist Banana Bread Recipe
Moist classic banana bread, ideal for a comforting breakfast or afternoon treat.
The essence of the dish:
A buttery chocolate base with a whisper of sea salt creates a contrast that feels both familiar and surprising.
A fun fact or historical angle:
Chocolate molding became popular in the United States after the 1893 World's Columbian Exposition, where artisans displayed intricate shapes.
Flavor or sensory focus:
Expect a glossy snap, followed by a melt‑in‑your‑mouth richness that carries a hint of vanilla.
You Must Know
-
Work with tempered chocolate for shine
-
Keep the kitchen cool to prevent bloom
-
Handle the turkeys gently when moving
Frequently Asked Questions
→ Can I use milk chocolate instead?
Yes, but the flavor will be sweeter and less intense; you may want to reduce the added sugar.
→ Do I need special molds?
Not at all – a piping bag with a small round tip works beautifully.
→ How long can they be stored?
Store in an airtight container at room temperature for up to a week, or freeze for longer.
→ What if my chocolate blooms?
Gently re‑melt and temper it again; bloom doesn’t affect taste, just appearance.
→ Can I add nuts?
Sure, a light sprinkle of toasted almonds adds a nice crunch.
→ Are they gluten‑free?
Yes, as long as you keep the work surface free from cross‑contamination.
Nutrition Facts
per serving
120
Calories
2g
Protein
12g
Carbs
9g
Fat
Taste Profile
Rich chocolate with a subtle buttery finish
Ingredient Substitutions
Don't have an ingredient? Try these alternatives
Will be sweeter; reduce added sugar accordingly.
Gives a subtle coconut aroma and keeps it dairy‑free.
Recipe Variations
Try these delicious twists on the original
Spicy Version
Add a pinch of cayenne pepper to the chocolate for a warm kick.
White Chocolate Twist
Swap dark chocolate for white chocolate and add orange zest.
Common Mistakes to Avoid
Learn from others' mistakes for perfect results
- Overheating chocolate, causing it to seize.
- Skipping the cooling step, leading to loss of shape.
- Using too much sugar, which can make the chocolate grainy.
Meal Prep & Storage
Make Ahead Tips
Melt and pipe the turkeys a day ahead; store in an airtight container and let them come to room temperature before serving.
Leftover Ideas
Enjoy the leftovers straight from the container or melt gently for a quick chocolate drizzle.
Perfect Pairings
Serve this with...
Cooking Timeline
Gather and measure all ingredients; line a tray with parchment.
Melt chocolate and butter together, stir in sugar, vanilla, and salt.
Transfer chocolate to piping bag and pipe turkey shapes onto parchment.
Allow turkeys to set, add sea salt and gold dust if using.
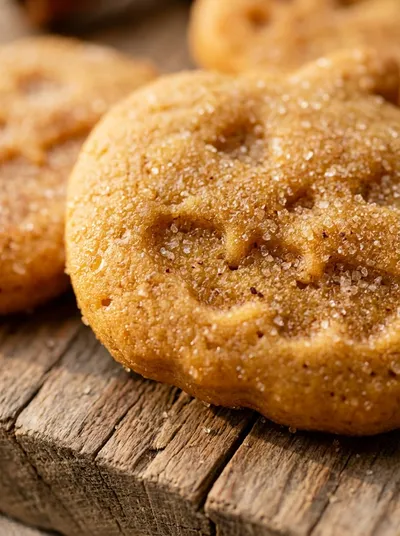

Chocolate Turkeys – Festive Dessert
Crisp chocolate turkeys that look like tiny, buttery birds, perfect for a playful Thanksgiving table. Easy to make, delightfully chocolatey, and sure to bring smiles.
Timing
Prep Time
15 Minutes
Cook Time
0 Minutes
Total Time
15 Minutes
Recipe Details
Ingredients
Main Ingredients
-
01
12 oz dark chocolate (60‑70% cacao)
-
02
2 tbsp unsalted butter
-
03
2 tbsp granulated sugar
-
04
1 tsp vanilla extract
-
05
¼ tsp sea salt flakes
-
06
Edible gold dust optional
Instructions
Set a heat‑proof bowl over a pot of simmering water, ensuring the bottom doesn’t touch the water.
Add chocolate and butter, stirring gently until fully melted and smooth.
Remove from heat, whisk in sugar, vanilla, and a pinch of sea salt.
Transfer the mixture to a piping bag fitted with a small round tip.
Pipe turkey shapes onto parchment‑lined trays, letting them set for 5‑10 minutes.
If using, dust lightly with gold and sprinkle extra sea salt just before the chocolate fully hardens.
Notes & Tips
-
1
Work quickly once the chocolate is melted; it thickens as it cools.
-
2
If the chocolate thickens too much, gently re‑warm it over low heat.
-
3
For a glossy finish, temper the chocolate using the seeding method.
 Desserts
No-Bake Cheesecake Bites: Easy Recipe
A quick, creamy no‑bake cheesecake bite perfect for any occasion.
Tools You'll Need
-
Double boiler or heat‑proof bowl
-
Whisk
-
Piping bag
-
Small round tip
-
Parchment paper
-
Spatula
Must-Know Tips
-
Don't overheat the chocolate; it can scorch.
-
Keep the kitchen cool to avoid chocolate bloom.
-
Use a silicone mat for easier release.
Professional Secrets
-
Temper chocolate for a snap and shine.
-
Add butter for a smoother mouthfeel.
-
Sprinkle sea salt at the very end for flavor contrast.

Recipe by
Sofia☕💖 A morning coffee lover who can’t resist melting chocolate into everything she bakes. Warm smiles and cocoa dreams! 🍩🌷
Get Delicious Recipes Weekly
Join 25,000+ home cooks getting our best recipes straight to their inbox.
Free forever • No spam • Unsubscribe anytime