
Vanilla ice cream has traveled from the royal courts of Mexico, where the vanilla orchid was first cultivated, to the humble home freezer. Its timeless appeal lies in the delicate balance of sweet cream and fragrant vanilla, a combination that has delighted crowds for centuries. The no‑cook method emerged in the mid‑20th century as a way to enjoy the classic taste without the labor of churning, making it accessible to anyone with a freezer and a whisk.
Why You'll Love It
-
- No need for an ice cream maker, just a bowl and patience
-
- Fresh vanilla flavor that feels homemade
-
- Quick turnaround – ready in under an hour
-
- Versatile base for countless mix‑ins
"The texture was so smooth, I almost forgot it was no‑cook!"
Essential Ingredient Guide
- Heavy cream: Choose a cream with at least 35% fat for that luxurious mouthfeel; keep it chilled until whisking.
- Whole milk: Provides balance; a good quality dairy milk helps keep the mixture from turning grainy.
- Vanilla beans or extract: Scrape the seeds from the pod for the deepest aroma, or use pure extract for convenience.
- Sugar: Fine granulated sugar dissolves quickly; adjust to taste, remembering the cold will mute sweetness.
- A pinch of salt: Enhances the vanilla flavor and rounds out the sweetness.
- Optional mix‑ins (fruit, chocolate chips): Add after the base has set to keep textures distinct.
 Breakfast & Brunch
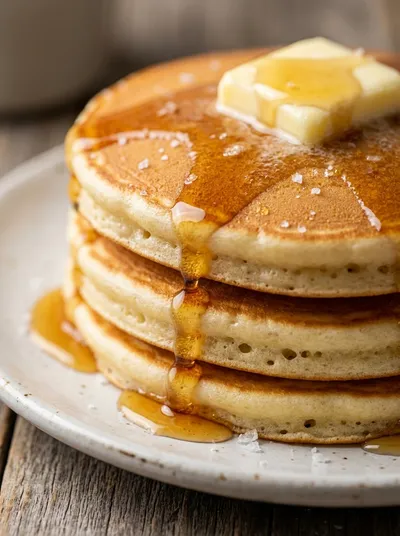
American Pancakes – Fluffy Breakfast Treat
Light, airy pancakes that drift like clouds on a plate, ideal for a relaxed morning.
Complete Cooking Process
-
Ingredient Readiness:
Chill the mixing bowl and whisk; cold tools keep the cream from separating too early.
-
Flavor Development:
Whisk together cream, milk, sugar, salt, and vanilla until the sugar is barely dissolved; the mixture should feel slightly thick.
-
Texture Control:
Transfer to a shallow pan and place in the freezer, stirring every 20‑30 minutes to break ice crystals.
-
Finishing Touches:
When the mixture is soft‑serve consistency, fold in any desired mix‑ins.
-
Serving Timing:
Let the ice cream sit a few minutes at room temperature before scooping for the smoothest bite.
-
Use a metal bowl; it freezes faster than glass.
-
Stir gently to create a creamy texture, not a frothy one.
-
Add a splash of vanilla extract if the beans are shy.
-
Cover the surface with parchment to prevent ice crystals.
Pro Tips
I remember the first time I tried this technique—yeah, the ice crystals were a bit stubborn, but after a couple of gentle stirs they melted away. It’s a little patience exercise, and the reward is that smooth, sigh‑worthy scoop that feels like a whisper of summer. So, take your time, and let the freezer do its quiet work.
 Breakfast & Brunch
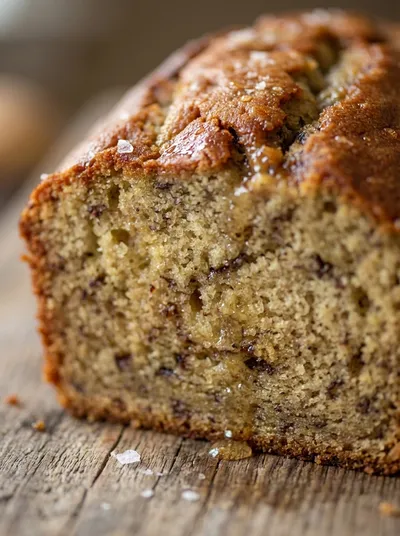
Classic Moist Banana Bread Recipe
Moist classic banana bread, ideal for a comforting breakfast or afternoon treat.
The essence of the dish:
A simple blend of cream, milk, and vanilla that transforms into a silk‑like ice cream without any heat, letting the pure flavors shine.
A fun fact or historical angle:
Vanilla was once worth more than gold in Europe, and its prized pods were once used as a luxury perfume.
Flavor or sensory focus:
Expect the gentle perfume of vanilla, a buttery creaminess, and a cool, velvety mouthfeel that melts slowly.
You Must Know
-
Keep everything cold
-
Stir regularly
-
Do not over‑freeze
Frequently Asked Questions
→ Can I use plant‑based milk?
Yes, substitute almond or oat milk for a dairy‑free version; just ensure it’s full‑fat for texture.
→ How long can I store the ice cream?
Keep it sealed in the freezer for up to two weeks; stir briefly before serving if it hardens.
→ Do I need an ice cream maker?
No, the no‑cook method relies on periodic stirring in the freezer.
→ What vanilla should I use?
Real vanilla beans give the deepest flavor; pure extract works fine in a pinch.
→ Can I add mix‑ins like chocolate chips?
Add them after the base reaches soft‑serve consistency to keep them crunchy.
→ Is sugar the only sweetener I can use?
Feel free to swap half the sugar for honey or maple syrup, but reduce the total liquid slightly.
Nutrition Facts
per serving
250
Calories
3g
Protein
15g
Carbs
20g
Fat
Taste Profile
Creamy vanilla sweetness with a subtle buttery note
Ingredient Substitutions
Don't have an ingredient? Try these alternatives
Gives a subtle coconut flavor; chill well before use.
Use slightly less liquid; the flavor becomes richer.
Recipe Variations
Try these delicious twists on the original
Spicy Version
Add a pinch of ground cinnamon and a dash of cayenne for a warm kick.
Mediterranean Style
Stir in crushed pistachios and a drizzle of honey after the base sets.
Common Mistakes to Avoid
Learn from others' mistakes for perfect results
- Using a warm bowl, which melts the cream too quickly.
- Stirring too aggressively, incorporating excess air.
- Leaving the mixture uncovered, leading to freezer burn.
Meal Prep & Storage
Make Ahead Tips
You can whisk the base a day ahead and keep it refrigerated; just give it a good stir before freezing.
Leftover Ideas
Store leftovers in a sealed container; let sit a few minutes at room temperature before scooping again.
Perfect Pairings
Serve this with...
Cooking Timeline
Chill bowl and whisk; gather all ingredients.
Whisk cream, milk, sugar, salt, and vanilla until sugar dissolves.
Freeze mixture, stirring every 20‑30 minutes to break ice crystals.
Fold in optional mix‑ins and let set until firm enough to scoop.
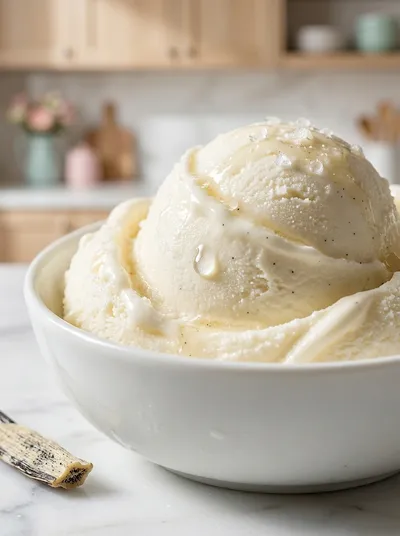
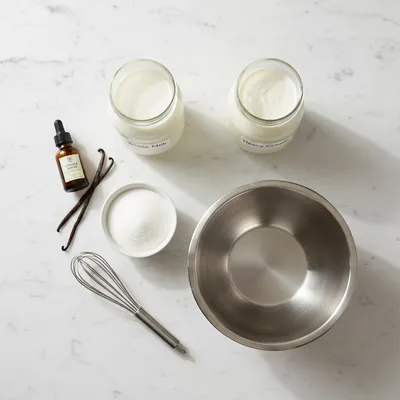
Homemade Vanilla Ice Cream – No‑Cook Recipe
A velvety vanilla ice cream that comes together without ever touching the stove—soft, creamy, and perfect for a quick indulgence any day of the week.
Timing
Prep Time
10 Minutes
Cook Time
0 Minutes
Total Time
1 Hour
Recipe Details
Ingredients
Base
-
01
2 cups heavy cream
-
02
1 cup whole milk
-
03
½ cup granulated sugar
-
04
1 vanilla bean (or 2 tsp pure vanilla extract)
-
05
A pinch of kosher salt
Optional Mix‑ins
-
01
½ cup fresh berries
-
02
¼ cup chocolate chips
-
03
¼ cup toasted nuts
Instructions
Place a metal mixing bowl and whisk in the freezer for about 10 minutes; this keeps the cream cold while you work.
In the chilled bowl, whisk together the heavy cream, whole milk, sugar, salt, and the scraped vanilla seeds until the sugar dissolves and the mixture looks slightly thick.
Transfer the mixture to a shallow pan, cover, and set in the freezer. Every 20‑30 minutes, pull it out and stir vigorously with a spatula, breaking up any ice crystals.
After about 45 minutes, when the texture resembles soft‑serve, fold in any optional mix‑ins like berries or chocolate chips.
Cover tightly and freeze for another 10‑15 minutes until firm enough to scoop. Let sit a couple of minutes at room temperature before serving.
Notes & Tips
-
1
If the mixture seems too icy, stir a bit longer next time.
-
2
For extra vanilla punch, split the vanilla bean and soak the seeds in the milk before mixing.
-
3
You can double the recipe for a larger batch; just ensure the bowl is big enough for stirring.
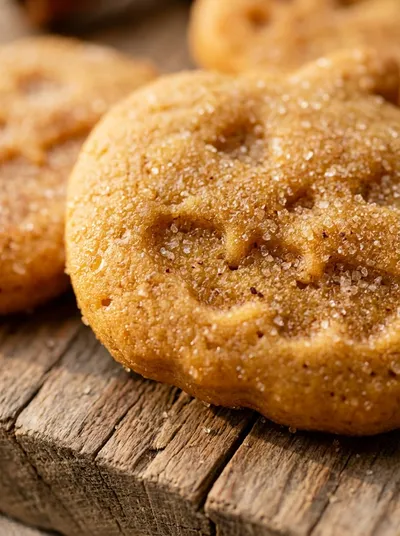
 Desserts
No-Bake Cheesecake Bites: Easy Recipe
A quick, creamy no‑bake cheesecake bite perfect for any occasion.
Tools You'll Need
-
Metal mixing bowl
-
Whisk
-
Spatula
-
Shallow freezer‑safe pan
-
Measuring cups and spoons
Must-Know Tips
-
Don’t skip chilling the bowl; it helps keep the cream from separating.
-
Stir gently but consistently to avoid large ice crystals.
-
Cover the surface with parchment paper to prevent frost.
Professional Secrets
-
Use a copper whisk for extra aeration.
-
Add a splash of vanilla extract after the first stir for layered flavor.
-
Freeze the mixture in a thin layer for faster crystallization.

Recipe by
Sofia☕💖 A morning coffee lover who can’t resist melting chocolate into everything she bakes. Warm smiles and cocoa dreams! 🍩🌷
Get Delicious Recipes Weekly
Join 25,000+ home cooks getting our best recipes straight to their inbox.
Free forever • No spam • Unsubscribe anytime