
The origins of this treat trace back to humble schoolyard lunches, where children would crumble cereal into peanut butter for a burst of energy. Over decades, that simple idea evolved, finding its way into modern kitchens as a no‑bake, crowd‑pleasing snack. Its enduring appeal lies in the comforting marriage of sweet honey, rich peanut butter, and the airy crunch that has delighted generations.
Why You'll Love It
-
- Only three ingredients, nothing fancy
-
- No oven needed, set‑and‑forget
-
- Naturally gluten‑free if you choose GF Cheerios
-
- Perfect portable snack for the whole family
"These bars are my go‑to for a guilt‑free pick‑me‑up. I love how they hold together and taste just like childhood memories."
Essential Ingredient Guide
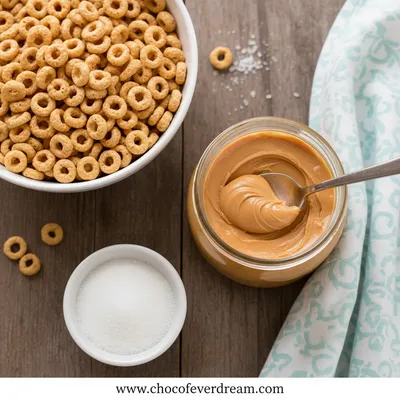
- Peanut Butter: Choose a natural, unsweetened variety for depth of flavor; it binds everything together.
- Honey: A light drizzle adds just the right sweetness and helps the bars set.
- Cheerios: The classic oat cereal provides the signature crunch and a hint of toasted grain.
- Salt (optional): A pinch can brighten the overall taste without overwhelming the sweet notes.
- Vanilla extract (optional): A few drops add a subtle aromatic lift, especially if the peanut butter is very plain.
- Optional mix‑ins: Add a handful of raisins or chocolate chips for extra texture if you wish.
 Desserts
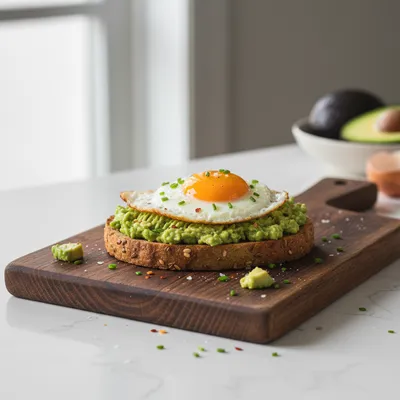
No-Bake Cheesecake Bites: Easy Recipe
A quick, creamy no‑bake cheesecake bite perfect for any occasion.
Complete Cooking Process
-
Ingredient Readiness:
Measure out the peanut butter and honey, then have the Cheerios ready in a large bowl.
-
Flavor Development:
Warm the peanut butter and honey together just until they meld, releasing a fragrant, buttery aroma.
-
Texture Control:
Stir in the Cheerios while the mixture is still warm, ensuring every piece is lightly coated.
-
Finishing Touches:
Press the mixture firmly into a lined pan, smoothing the top with a spatula.
-
Serving Timing:
Let the bars chill in the refrigerator for at least 30 minutes before slicing for clean edges.
-
Use a square pan for uniformly sized bars.
-
Line the pan with parchment for an easy lift.
-
Press the mixture with the back of a spoon for extra compactness.
-
Store in an airtight container to maintain crunch.
Pro Tips
After you’ve followed these little tricks, you’ll notice the bars hold together better and stay delightfully crisp. It’s the kind of quiet confidence that comes from years of kitchen practice, a gentle reminder that the simplest things often taste the best.
Take a moment to let the aroma settle before you cut—there’s a calm satisfaction in that pause, a small celebration of the everyday.
 Snacks & Treats
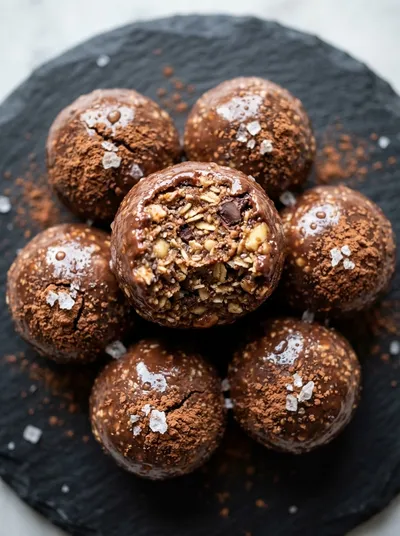
Energy Balls – Healthy Easy No‑Bake Snack
A tasty, chewy bite of oats, nuts, and dates that fuels you without a whisk or oven.
The essence of the dish:
It’s the balance of creamy, sweet, and crisp that makes these bars unforgettable. The peanut butter creates a velvety base, the honey glazes it lightly, and the Cheerios keep each bite airy.
A fun fact or historical angle:
Cheerios were originally developed in the 1940s as a health‑focused cereal, and they’ve been a staple in American pantries for generations.
Flavor or sensory focus:
You’ll first notice the nutty aroma, then the gentle honeyed sweetness, followed by the satisfying crunch that echoes the sound of a fresh morning.
You Must Know
-
Bars set best when chilled
-
Do not over‑mix once the Cheerios are added
-
Keep them sealed to prevent humidity
Frequently Asked Questions
→ Can I use a different cereal?
Absolutely! Try granola, puffed rice, or even cornflakes for a different texture.
→ How long do the bars last?
Stored in an airtight container, they stay fresh for up to a week at room temperature, or two weeks refrigerated.
→ Is this recipe gluten‑free?
Yes, just swap regular Cheerios for a certified gluten‑free oat cereal.
→ Can I add protein powder?
Sure, blend a scoop into the wet mixture for a protein‑boosted version.
→ Do I need to bake them?
No oven required—just chill until firm.
→ What’s a good topping?
A drizzle of melted dark chocolate or a sprinkle of sea salt adds a nice contrast.
Nutrition Facts
per serving
120
Calories
4g
Protein
12g
Carbs
7g
Fat
Taste Profile
A gentle sweet‑nutty flavor with a comforting crunch.
Ingredient Substitutions
Don't have an ingredient? Try these alternatives
Flavor changes slightly; keep natural varieties for best binding.
Watch the liquid ratio; a thinner sweetener may need a brief extra cooling.
Recipe Variations
Try these delicious twists on the original
Chocolate Drizzle
Melt dark chocolate and drizzle over the cooled bars for an indulgent finish.
Berry Burst
Fold in dried cranberries or blueberries for a fruity contrast.
Common Mistakes to Avoid
Learn from others' mistakes for perfect results
- Over‑heating the honey, which can cause a bitter taste.
- Pressing too lightly, leading to crumbly bars.
- Skipping the chilling step, resulting in soft, unsteady pieces.
Meal Prep & Storage
Make Ahead Tips
Mix and press the bars up to 24 hours ahead; keep refrigerated and slice just before serving.
Leftover Ideas
Enjoy straight from the fridge; they stay tender and flavorful for days.
Perfect Pairings
Serve this with...
Cooking Timeline
Combine peanut butter and honey in saucepan; melt gently.
Remove from heat, let cool briefly.
Stir in Cheerios until coated.
Press mixture into prepared pan.
Refrigerate to set, then cut into bars.
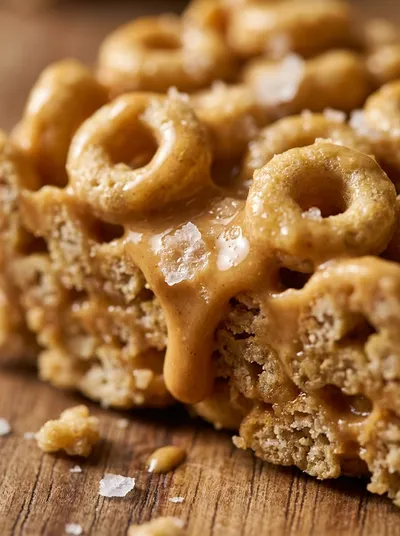
Peanut Butter Cheerio Bars – Easy 3-Ingredient Snack
A humble, three‑ingredient treat that brings together creamy peanut butter, golden honey, and the nostalgic crunch of Cheerios. Perfect for an afternoon pause or a quick bite before the kids get home.
Timing
Prep Time
5 Minutes
Cook Time
0 Minutes
Total Time
35 Minutes
Recipe Details
Ingredients
Main Ingredients
-
01
1 cup natural peanut butter
-
02
1/2 cup honey
-
03
3 cups Cheerios cereal
Instructions
In a small saucepan over low heat, combine the peanut butter and honey; stir gently until the mixture is smooth and fragrant.
Remove from heat and let cool for about a minute, then pour the warm mixture over the Cheerios in a large mixing bowl.
Using a spatula, fold the Cheerios into the wet mixture until every piece is lightly coated; be careful not to over‑mix.
Press the mixture firmly into a parchment‑lined 8×8‑inch pan, smoothing the top with the back of a spoon.
Refrigerate for at least 30 minutes, then lift the block out of the pan, cut into bars, and serve.
Notes & Tips
-
1
If the mixture feels too sticky, let it cool a bit longer before pressing.
-
2
For a softer bar, reduce the chilling time to 15 minutes.
-
3
Experiment with a dash of cinnamon for warm spice notes.
Tools You'll Need
-
Small saucepan
-
Spatula
-
Large mixing bowl
-
8×8‑inch pan
-
Parchment paper
-
Sharp knife
Must-Know Tips
-
Do not overheat the peanut butter; it can become grainy.
-
Press firmly to avoid crumbly bars.
-
Store in a cool, dry place to keep the crunch.
Professional Secrets
-
Warm the wet ingredients just enough to flow, not boil.
-
Use parchment for an easy release without breaking.
-
Press with a flat, heavy object for uniform density.

Recipe by
Layla🍪🔥 A bold baker with a wild imagination — Layla mixes adventure, love, and rich chocolate in every recipe she shares. 🌈🍫
Get Delicious Recipes Weekly
Join 25,000+ home cooks getting our best recipes straight to their inbox.
Free forever • No spam • Unsubscribe anytime