
The origins of decorative cookie figures trace back to Victorian gingerbread houses, where bakers sculpted whimsical shapes for holiday celebrations. Over time, the practice evolved into playful, themed treats for various festivities. Today, the zombie finger cookie stands as a modern twist, combining classic sugar cookie techniques with theatrical presentation. The concept of using almond slices as fingernails adds a texture contrast that harks back to old confectionery tricks of adding crunch for surprise. This treat merges nostalgia with a contemporary, spooky flair, making it a favorite for Halloween gatherings.
Why You'll Love It
-
- Simple ingredients you likely already have
-
- Fun hands‑on activity for kids and adults
-
- Textural contrast from soft dough to crunchy almond nail
-
- Vibrant pink glaze that looks like fresh blood
"These cookies were the hit of our spooky night – creepy, tasty, and so easy!"
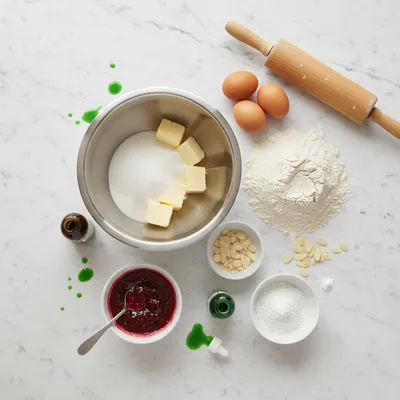
Essential Ingredient Guide
- All‑purpose flour: Provides the structure; sift for a light, tender crumb.
- Almond slices: Use thin slices for realistic fingernails; they add a satisfying snap.
- Cream cheese frosting: Gives the pink glaze its silkiness and tangy brightness.
- Vanilla extract: Adds warmth and depth without overpowering the sweet base.
- Lemon zest: A tiny hint of citrus lifts the flavor and balances the sweetness.
- Granulated sugar: Sweetens the dough and helps achieve a crisp edge.
 Breakfast & Brunch
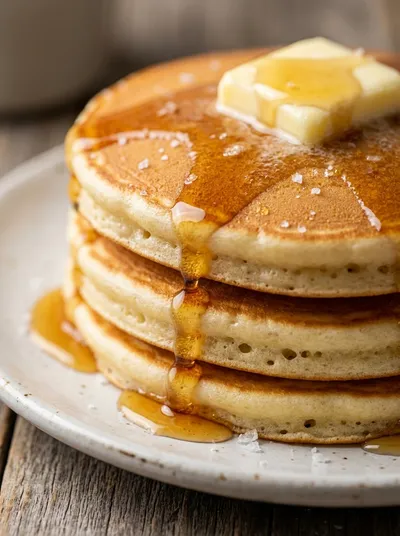
American Pancakes – Fluffy Breakfast Treat
Light, airy pancakes that drift like clouds on a plate, ideal for a relaxed morning.
Complete Cooking Process
-
Ingredient Readiness:
Measure and sift dry ingredients, soften butter, and let almond slices rest at room temperature.
-
Flavor Development:
Cream butter and sugar until light, then fold in vanilla and zest, allowing the aroma to bloom.
-
Texture Control:
Gently incorporate flour to avoid over‑mixing; shape into fingers and press almond nails before chilling.
-
Finishing Touches:
Brush with pink glaze, let it set, then add a tiny dab of red jam for a blood‑like drop.
-
Serving Timing:
Serve at room temperature; the cookies stay soft for a few hours before the glaze hardens.
-
Chill the dough for at least 30 minutes to keep shapes crisp.
-
Use a tiny offset spatula to spread the glaze evenly.
-
Press almond nails lightly – too hard and they may crack.
-
Store in a single layer to maintain the glaze's shine.
Pro Tips
These little tricks keep the cookies looking like real fingers, even after a night of revelry. I often find that a short rest in the fridge before serving lets the glaze set just enough for a glossy finish without becoming too hard. It’s the little pauses that make the whole process feel like a quiet ritual, and that calm adds to the enjoyment of sharing them with friends.
 Breakfast & Brunch
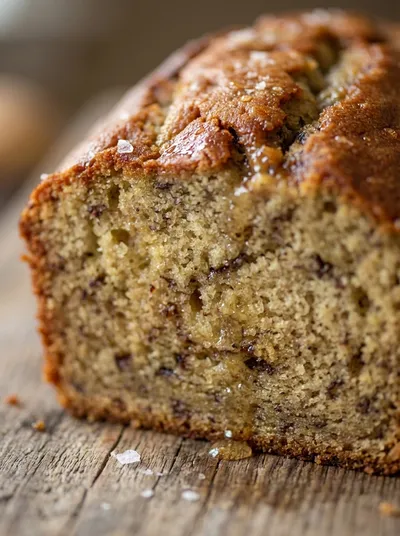
Classic Moist Banana Bread Recipe
Moist classic banana bread, ideal for a comforting breakfast or afternoon treat.
The essence of the dish:
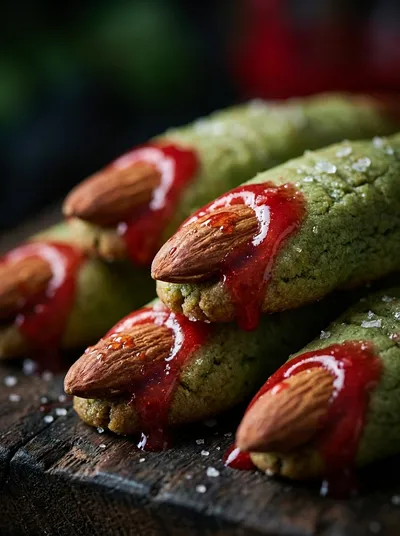
What makes these cookies special is the contrast between a buttery, melt‑in‑your‑mouth base and the crisp almond nail that mimics a real finger. The pink glaze adds a visual pop that feels like a fresh bite, hinting at both sweetness and a playful fright.
A fun fact or historical angle:
Did you know that sugar cookies were originally shaped for holidays like Christmas and Easter? Over the years, bakers turned to Halloween for more daring designs, leading to the invention of spooky finger treats.
Flavor or sensory focus:
First, you’ll notice the warm vanilla scent, then the tang of lemon zest, followed by the soft crumb that gives way to the crunchy almond nail. The pink glaze offers a sweet, creamy coating that feels almost like a whisper of candy.
You Must Know
-
Chill the dough for best shape retention
-
Handle almond slices gently
-
Glaze before the cookies become too warm
Frequently Asked Questions
→ Can I use almond flour instead of almond slices?
Almond flour won’t give the same nail‑like crunch; thin almond slices are essential for the texture contrast.
→ How do I keep the glaze from melting?
Let the cookies cool completely before glazing, and store them in a cool, dry place.
→ Can I make these gluten‑free?
Yes, substitute all‑purpose flour with a 1‑to‑1 gluten‑free blend and follow the same steps.
→ What if I don’t have cream cheese?
A mix of butter and powdered sugar can work, but the tangy pink glaze will be less authentic.
→ How far in advance can I prepare them?
The dough can be refrigerated for up to 24 hours; glaze can be prepared the day before.
→ Do I need special equipment?
A small cookie cutter or a knife to shape the fingers, and a pastry brush for the glaze are all you need.
Nutrition Facts
per serving
120
Calories
2g
Protein
15g
Carbs
6g
Fat
Taste Profile
A sweet, buttery bite with a hint of citrus and a satisfying crunch.
Ingredient Substitutions
Don't have an ingredient? Try these alternatives
Use a 1‑to‑1 substitution; the texture may be slightly more crumbly.
Will alter the flavor and color, but still provide a crunchy nail.
Recipe Variations
Try these delicious twists on the original
Spicy Version
Add a pinch of cayenne to the dough and a drizzle of honey‑chili glaze for a hidden kick.
Chocolate Dip
Instead of pink glaze, dip the cooled cookies in melted dark chocolate and sprinkle sea salt.
Common Mistakes to Avoid
Learn from others' mistakes for perfect results
- Over‑mixing the dough, which makes cookies tough.
- Baking too long – the glaze can burn and turn bitter.
- Using thick almond slices, resulting in hard, unrealistic nails.
Meal Prep & Storage
Make Ahead Tips
You can prepare the dough and shape the fingers up to one day ahead; keep them wrapped in the fridge. The glaze can be made 2‑3 hours before serving and stored in a sealed container.
Leftover Ideas
Store leftovers in an airtight container; they stay fresh for a few days and can be revived with a quick warm-up in the oven for 5 minutes.
Perfect Pairings
Serve this with...
Cooking Timeline
Gather and measure all ingredients; zest lemon and slice almonds.
Cream butter and sugar, then add egg, vanilla, and zest.
Combine dry ingredients, fold in almond slices, and chill dough.
Shape dough into fingers, press almond nails, and bake.
Cool cookies, prepare pink glaze, and brush onto cookies.
Add red jam drops for blood effect; let glaze set.
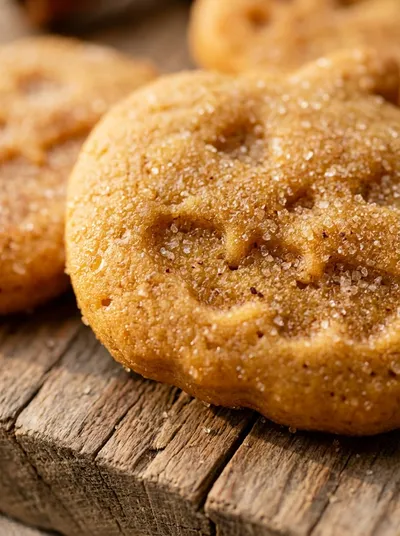
Zombie Finger Cookies Recipe
These zombie finger cookies are a spooky delight, perfect for a Halloween gathering. The dough feels soft, the almond “nail” gives a creepy crunch, and the pink glaze mimics a little bite of blood. Wow, they taste as fun as they look, and they’re surprisingly easy to make.
Timing
Prep Time
30 Minutes
Cook Time
12 Minutes
Total Time
42 Minutes
Recipe Details
Ingredients
Cookie Dough
-
01
2 ¼ cups all‑purpose flour
-
02
½ teaspoon baking powder
-
03
¼ teaspoon salt
-
04
¾ cup unsalted butter, softened
-
05
¾ cup granulated sugar
-
06
1 large egg
-
07
1 ½ teaspoons vanilla extract
-
08
1 teaspoon lemon zest
-
09
¼ cup almond slices, thinly sliced
Pink Glaze
-
01
4 oz cream cheese, softened
-
02
¼ cup powdered sugar
-
03
½ teaspoon vanilla extract
-
04
1–2 teaspoons pink food coloring
-
05
1 teaspoon red jam (for blood drop)
Instructions
In a bowl, whisk together flour, baking powder, and salt; set aside.
Cream butter and sugar until light and fluffy, then beat in the egg, vanilla, and lemon zest.
Gradually add the dry ingredients, mixing just until combined. Fold in the thin almond slices.
Wrap the dough, chill for 30 minutes, then roll into a log and cut into finger‑sized pieces.
Shape each piece into a finger, press an almond slice at the tip for a nail, and place on a parchment sheet.
Bake at 350°F (175°C) for 10‑12 minutes, until edges are lightly golden. Cool completely.
While cookies cool, beat cream cheese, powdered sugar, vanilla, and pink coloring until smooth.
Brush each cookie with glaze, then add a tiny dollop of red jam at the nail for a realistic blood effect.
Notes & Tips
-
1
If the almond slices are too thick, they may break; slice as thinly as possible.
-
2
For a deeper pink, add a touch more food coloring gradually.
-
3
Store in a single layer to keep the glaze from smudging.
 Desserts
No-Bake Cheesecake Bites: Easy Recipe
A quick, creamy no‑bake cheesecake bite perfect for any occasion.
Tools You'll Need
-
Mixing bowls
-
Electric mixer
-
Rolling pin
-
Cookie cutter or knife
-
Pastry brush
-
Baking sheet
-
Parchment paper
Must-Know Tips
-
Chill the dough, prevents spreading and keeps finger shape intact.
-
Use a light hand when pressing almond nails, they should sit gently.
-
Glaze when cookies are fully cooled, ensures the coating sets nicely.
Professional Secrets
-
Room temperature butter creates an even crumb.
-
Briefly chilling after shaping locks in the finger silhouette.
-
A thin glaze adds shine without weighing down the cookie.

Recipe by
Sofia☕💖 A morning coffee lover who can’t resist melting chocolate into everything she bakes. Warm smiles and cocoa dreams! 🍩🌷
Get Delicious Recipes Weekly
Join 25,000+ home cooks getting our best recipes straight to their inbox.
Free forever • No spam • Unsubscribe anytime