
Chocolate has traveled from ancient Mesoamerican rituals to modern kitchens, becoming a universal symbol of comfort. Combining it with protein powder creates a snack that honors its rich heritage while meeting today’s nutritional needs. The concept of bite‑size energy treats emerged in the early 2000s, inspired by athletes seeking convenient fuel. This recipe captures that spirit, offering a timeless treat that feels both classic and contemporary.
Why You'll Love It
-
- No oven needed, perfect for any kitchen
-
- Soft, melt‑in‑your‑mouth texture
-
- Protein boost keeps you satisfied longer
-
- Easy to customize with nuts or seeds
"These balls are my go‑to after a walk—soft, chocolatey, and surprisingly filling!"
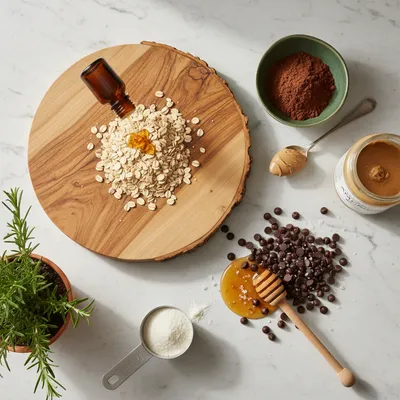
Essential Ingredient Guide
- Whey protein powder: Choose a chocolate‑flavored or unflavored whey; it adds body and muscle‑supporting protein.
- Rolled oats: Provides gentle sweetness and a chewy base; opt for gluten‑free if needed.
- Nut butter: Adds richness and helps bind the mixture; almond or peanut work well.
- Cocoa powder: Pure unsweetened cocoa gives deep chocolate flavor without extra sugar.
- Honey or maple syrup: A touch of natural sweetener balances the bitterness of cocoa.
- Vanilla extract: A few drops lift the aroma, making the scent linger pleasantly.
 Snacks & Treats
Energy Balls – Healthy Easy No‑Bake Snack
A tasty, chewy bite of oats, nuts, and dates that fuels you without a whisk or oven.
Complete Cooking Process
-
Ingredient Readiness:
Measure and sift dry ingredients, then warm the nut butter and honey together for easy mixing.
-
Flavor Development:
Combine cocoa, protein powder, and oats, then fold in the warm butter mixture to release chocolate aroma.
-
Texture Control:
Roll the mixture between your palms; the warmth of your hands creates a soft, cohesive ball.
-
Finishing Touches:
Optionally roll each ball in shredded coconut or crushed nuts for extra texture.
-
Serving Timing:
Let the balls set in the fridge for at least 20 minutes; they taste best chilled.
-
If the mixture feels dry, add a splash of almond milk.
-
Use a cookie scoop for uniform size.
-
Store in an airtight container to keep moisture out.
-
Freeze for up to a month for longer freshness.
Pro Tips
These small habits keep the balls fresh and delightful. I remember once letting them sit out too long, and the texture softened too much—so a quick chill does wonders. Really, the simple act of refrigerating restores that perfect bite.
The essence of the dish:
A harmonious blend of chocolate, protein, and oats that feels both comforting and energizing.
A fun fact or historical angle:
Cacao beans were once used as currency in ancient civilizations, highlighting chocolate’s lasting value.
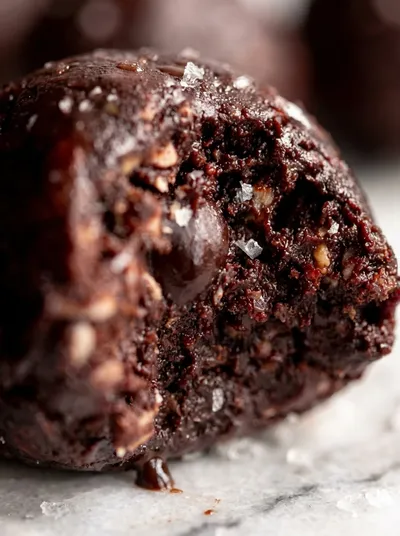
Flavor or sensory focus:
The first bite reveals a silky cocoa scent, followed by a tender, slightly chewy center.
You Must Know
-
Keep the mixture cool while shaping.
-
Don’t over‑process; a few lumps are fine.
-
Adjust sweetness to taste with extra honey.
Frequently Asked Questions
→ Can I use plant‑based protein?
Absolutely, pea or soy protein work well; just ensure the flavor complements the chocolate.
→ How long do they keep?
Stored in the fridge, they stay fresh for up to a week; longer if frozen.
→ Can I add nuts?
Yes, chopped almonds, walnuts, or pistachios add a pleasant crunch.
→ What if the mixture is too sticky?
Add a tablespoon more oats or a bit of cocoa powder until it’s manageable.
→ Are they suitable for kids?
They are, as long as you choose a protein powder without added caffeine or stimulants.
→ Do I need to bake them?
No, they are a no‑bake snack; just chill to set.
Nutrition Facts
per serving
120
Calories
8g
Protein
12g
Carbs
6g
Fat
Taste Profile
Rich cocoa sweetness with a subtle nutty finish
Ingredient Substitutions
Don't have an ingredient? Try these alternatives
Adjust sweetness as some plant proteins are less sweet.
Great for those avoiding nuts; texture remains creamy.
Recipe Variations
Try these delicious twists on the original
Spicy Version
Add a pinch of cayenne pepper and roll in cacao nibs for a gentle heat.
Mediterranean Style
Incorporate toasted sesame seeds and a drizzle of honey‑orange glaze.
Common Mistakes to Avoid
Learn from others' mistakes for perfect results
- Over‑mixing the dough, which can make balls dense.
- Skipping the chill step, leading to crumbly texture.
- Using too much honey, causing excess stickiness.
Meal Prep & Storage
Make Ahead Tips
You can prepare the mixture a day ahead, keep it covered, and shape the balls just before serving.
Leftover Ideas
Enjoy a quick bite straight from the fridge; if they firm up, let them sit at room temperature for a few minutes.
Perfect Pairings
Serve this with...
Cooking Timeline
Gather and measure all ingredients; warm butter and honey.
Combine dry ingredients in a bowl, then stir in the warm mixture.
Roll mixture into balls and coat with optional toppings.
Chill balls in the refrigerator until set.
 Easy Snacks
Grilled Corn Salad Recipe
Sweet charred corn meets crunchy vegetables in a zesty vinaigrette, creating a satisfying snack or side.
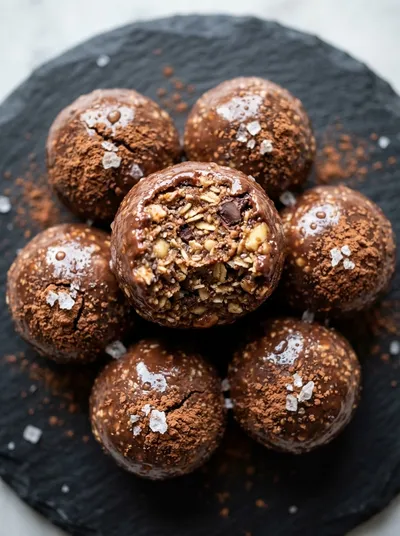
Chocolate Protein Bliss Balls
These chocolate protein bliss balls are a quick, no‑bake snack that feels like a small, velvet‑soft indulgence while delivering a protein boost for the day.
Timing
Prep Time
15 Minutes
Cook Time
0 Minutes
Total Time
15 Minutes
Recipe Details
Ingredients
Base Ingredients
-
01
1 cup rolled oats
-
02
1/2 cup chocolate whey protein powder
-
03
1/4 cup unsweetened cocoa powder
-
04
1/2 cup nut butter (almond or peanut)
-
05
1/4 cup honey or maple syrup
-
06
1 tsp vanilla extract
-
07
Pinch of sea salt
Optional Coating
-
01
2 tbsp shredded coconut
-
02
2 tbsp crushed almonds
Instructions
In a small saucepan, gently warm the nut butter and honey together over low heat until smooth; this helps them blend without lumps.
In a large bowl, combine rolled oats, protein powder, cocoa powder, and sea salt; stir to distribute evenly.
Pour the warm butter‑honey mixture into the dry ingredients, add vanilla extract, and stir until a sticky dough forms.
Using your hands, roll the dough into bite‑size balls, then roll each ball in shredded coconut or crushed almonds if desired.
Place the balls on a parchment‑lined tray and chill in the refrigerator for at least 20 minutes before serving.
Notes & Tips
-
1
If the dough feels too dry, add a teaspoon of almond milk at a time.
-
2
For a sweeter treat, drizzle a little extra honey over the balls before chilling.
-
3
These balls can be frozen; simply thaw for a few minutes before enjoying.
 Desserts
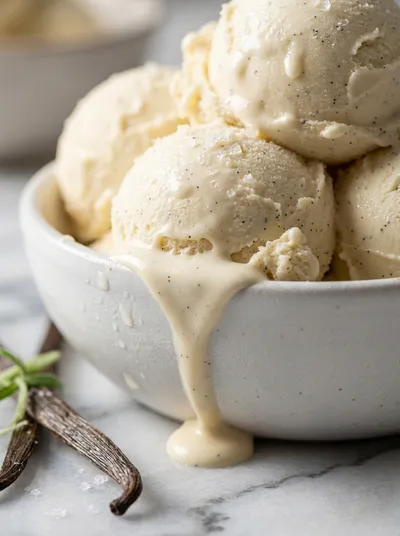
Vanilla Ice Cream – No‑Cook Homemade Treat
No‑cook vanilla ice cream that’s silky, sweet, and ready in minutes—perfect for an easy homemade treat.
Tools You'll Need
-
Small saucepan
-
Mixing bowl
-
Spatula or wooden spoon
-
Measuring cups and spoons
-
Cookie scoop or spoon
-
Parchment paper
Must-Know Tips
-
Don’t over‑mix; a few lumps keep the texture interesting.
-
Keep the mixture cool; warm dough can become overly sticky.
-
Roll uniformly for consistent bite size.
Professional Secrets
-
Warm the nut butter just enough to blend, preserving its natural oils.
-
A pinch of sea salt enhances the chocolate depth.
-
Chilling solidifies the texture without drying out the balls.

Recipe by
Layla🍪🔥 A bold baker with a wild imagination — Layla mixes adventure, love, and rich chocolate in every recipe she shares. 🌈🍫
Get Delicious Recipes Weekly
Join 25,000+ home cooks getting our best recipes straight to their inbox.
Free forever • No spam • Unsubscribe anytime