
Protein balls have traveled from gym‑bags to grandma’s pantry, becoming a staple for anyone needing a bite of sustenance without a stove. In the early 2000s, nutritionists began recommending portable, protein‑rich snacks for athletes, and the humble ball quickly entered mainstream snack culture. Today it’s a beloved shortcut for busy families, offering a sweet yet nutritious alternative to candy.
Why You'll Love It
-
- No oven needed, perfect for summer kitchens
-
- Simple pantry ingredients you already have
-
- Long‑lasting energy without a sugar crash
-
- Soft, chewy texture that feels comforting
"These balls keep my kids happy and my pantry tidy—pure joy in every bite!"
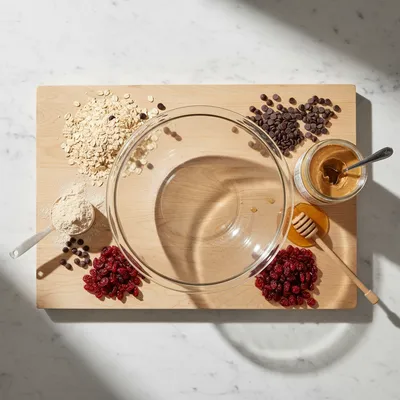
Essential Ingredient Guide
- Rolled oats: Provides gentle carbs and a hearty base; pick whole‑grain for extra fiber.
- Natural peanut butter: Adds creamy richness and protein; stir well to avoid oil separation.
- Honey: A natural sweetener that helps bind; you can swap maple syrup if you prefer.
- Protein powder: Choose a vanilla or unflavored whey for smoothness; plant‑based works too.
- Mini chocolate chips: Tiny bursts of cocoa that melt into the warm butter.
- Ground cinnamon: A pinch adds warmth without overpowering the sweet notes.
 Snacks & Treats
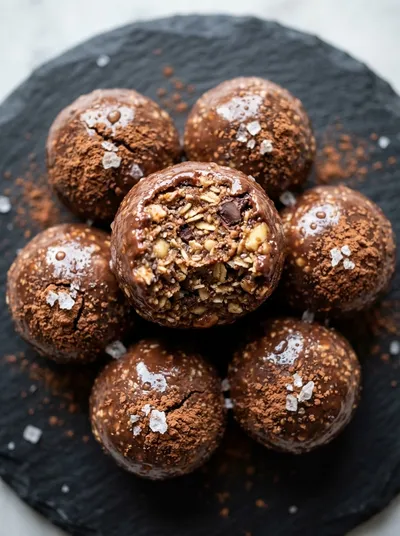
Energy Balls – Healthy Easy No‑Bake Snack
A tasty, chewy bite of oats, nuts, and dates that fuels you without a whisk or oven.
Complete Cooking Process
-
Ingredient Readiness:
Measure oats, protein powder, and spices first; this keeps the mixing quick.
-
Flavor Development:
Warm the nut butter and honey just enough to mingle; this releases their aromas.
-
Texture Control:
Mix until the batter clings, then roll gently; avoid over‑mixing which can make them dense.
-
Finishing Touches:
Roll each ball in extra cinnamon or cocoa for a polished look.
-
Serving Timing:
Let balls chill for 15‑20 minutes; they set up nicely and are ready to grab.
-
If the mix feels dry, add a splash of almond milk.
-
Store in the freezer for up to 3 months; defrost for a soft bite.
-
Roll between parchment sheets for a dust‑free surface.
-
Adjust sweetness by tasting the warm mixture before forming.
Pro Tips
Well, I’ve learned that a little extra patience at the cooling stage makes the difference between a crumbly clump and a perfect bite. So don’t rush the chill‑out; let the balls settle, and you’ll notice a smoother, more cohesive texture. It’s a tiny pause that turns a quick snack into a comforting ritual.
The essence of the dish:
It’s all about balance – chewy oats, creamy butter, and a dash of sweetness that together give you steady energy.
A fun fact or historical angle:
The first documented protein‑ball recipe appeared in a 1998 fitness magazine and quickly became a pantry staple.
Flavor or sensory focus:
You’ll notice the warm scent of cinnamon mingling with the subtle richness of toasted oats, followed by a soft‑chewy bite.
You Must Know
-
All ingredients should be at room temperature.
-
Chill the balls for best texture.
-
Keep a small bowl of extra chocolate chips for rolling.
Frequently Asked Questions
→ Can I use almond butter instead of peanut butter?
Yes, almond butter works fine; just ensure it’s smooth so the balls bind properly.
→ How long do the protein balls keep?
Store them in an airtight container in the fridge for up to a week, or freeze for three months.
→ Do I need a food processor?
A sturdy mixing bowl and a spoon work, but a processor speeds up the blending.
→ Can I make them vegan?
Swap honey for maple syrup and use a plant‑based protein powder.
→ What’s a good serving size?
One ball (about 30 g) provides roughly 120 calories and 8 g protein.
→ Will they melt in the sun?
If it’s hot, keep them in a cooler bag; the butter can soften but won’t fully melt.
Nutrition Facts
per serving
120
Calories
8g
Protein
12g
Carbs
6g
Fat
Taste Profile
Balanced sweet‑nutty flavor with a hint of cocoa
Ingredient Substitutions
Don't have an ingredient? Try these alternatives
Almond butter adds a milder flavor; keep it smooth.
Maple syrup offers a deeper sweetness; reduce a little.
Recipe Variations
Try these delicious twists on the original
Spicy Version
Add a pinch of cayenne and a drizzle of sriracha for a subtle kick.
Mediterranean Style
Mix in chopped dried apricots, pistachios, and a sprinkle of za'atar.
Common Mistakes to Avoid
Learn from others' mistakes for perfect results
- Overheating the butter, which makes the mix oily.
- Skipping the chill step, leading to crumbly balls.
- Using too much protein powder, resulting in a dry texture.
Meal Prep & Storage
Make Ahead Tips
You can blend all ingredients and shape the balls up to 24 hours ahead; just keep them refrigerated and they’ll stay fresh.
Leftover Ideas
If you have leftovers, let them sit at room temperature for a few minutes before enjoying; they’ll soften nicely.
Perfect Pairings
Serve this with...
Cooking Timeline
Gather and measure all dry ingredients.
Warm peanut butter and honey together.
Combine wet and dry mixtures; stir in chocolate chips.
Roll into balls and place on parchment.
Chill in the refrigerator before serving.
 Easy Snacks
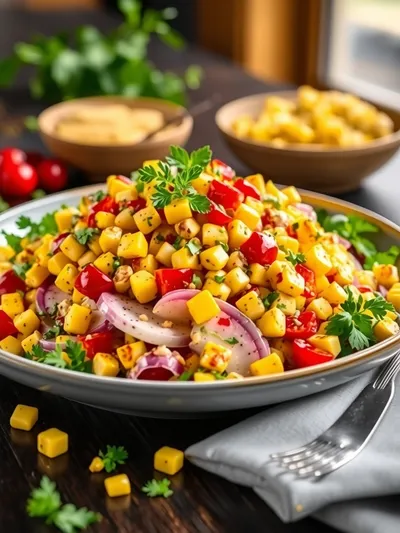
Grilled Corn Salad Recipe
Sweet charred corn meets crunchy vegetables in a zesty vinaigrette, creating a satisfying snack or side.
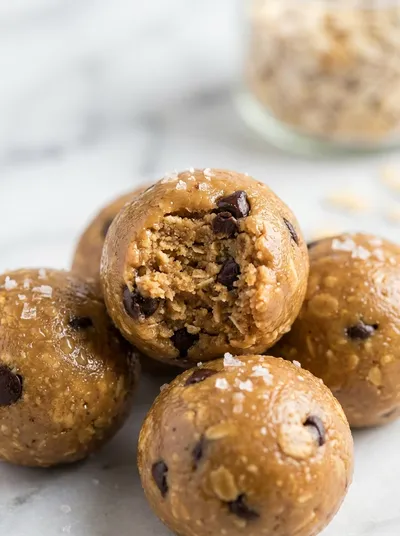
Protein Balls – No‑Bake Energy Snack
Whip up these no‑bake protein balls for a quick, nutritious snack that fuels your day with flavor and energy.
Timing
Prep Time
15 Minutes
Cook Time
0 Minutes
Total Time
15 Minutes
Recipe Details
Ingredients
Base
-
01
1 cup rolled oats
-
02
1/2 cup vanilla protein powder
-
03
1/4 tsp ground cinnamon
Binding
-
01
1/2 cup natural peanut butter
-
02
1/4 cup honey
-
03
2 tbsp mini chocolate chips
Instructions
In a large bowl, combine oats, protein powder, and cinnamon; stir until evenly mixed.
In a small saucepan over low heat, warm peanut butter and honey just until they blend, about 2 minutes.
Pour the warm mixture over the dry ingredients, add chocolate chips, and stir until the batter sticks together.
Using a spoon, scoop out roughly one‑tablespoon portions and roll between your palms into balls.
Place the balls on a parchment‑lined tray and refrigerate for 15‑20 minutes before serving.
Notes & Tips
-
1
If the mixture feels too dry, add a teaspoon of almond milk.
-
2
For extra crunch, toast the oats lightly before mixing.
-
3
Roll some balls in shredded coconut for a tropical twist.
 Desserts
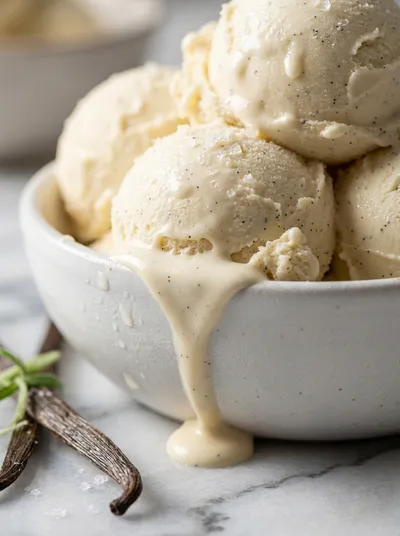
Vanilla Ice Cream – No‑Cook Homemade Treat
No‑cook vanilla ice cream that’s silky, sweet, and ready in minutes—perfect for an easy homemade treat.
Tools You'll Need
-
Large mixing bowl
-
Small saucepan
-
Spatula or spoon
-
Measuring cups
-
Parchment paper
-
Refrigerator
Must-Know Tips
-
Don’t overheat the butter, or it will separate.
-
Work quickly when rolling; the mixture firms as it cools.
-
Store in a sealed container to maintain chewiness.
Professional Secrets
-
Room temperature ingredients bind better.
-
A brief chill sets the texture without hardening the butter.
-
Evenly sized balls bake (or chill) uniformly.

Recipe by
Layla🍪🔥 A bold baker with a wild imagination — Layla mixes adventure, love, and rich chocolate in every recipe she shares. 🌈🍫
Get Delicious Recipes Weekly
Join 25,000+ home cooks getting our best recipes straight to their inbox.
Free forever • No spam • Unsubscribe anytime