
The Queens Chocolate Biscuit Cake traces its roots to British tea‑time traditions where leftovers of biscuits and chocolate were cleverly combined into a comforting no‑bake dessert. Over decades, families adapted the recipe, adding richer ganache and decorative layers. This classic embodies a humble ingenuity that turns pantry staples into a celebration-worthy centerpiece.
Why You'll Love It
-
- No oven needed, just a fridge
-
- Simple ingredients you already have
-
- Elegant presentation that feels special
-
- Flexible for any occasion
"The texture is perfect—soft inside, with a hint of crunch. My kids can’t get enough!"
Essential Ingredient Guide
- Chocolate (dark or milk): Choose a good quality chocolate; it melts smooth and gives deep flavor.
- Digestive biscuits: They provide a buttery crunch; break them into rough pieces for texture.
- Butter: Creates a silky ganache that holds the cake together.
- Sugar: A touch of sweetness balances the bittersweet chocolate.
- Milk or cream: Adds richness and helps the ganache set nicely.
- Vanilla extract: A small splash brightens the overall flavor.
 Desserts
No-Bake Cheesecake Bites: Easy Recipe
A quick, creamy no‑bake cheesecake bite perfect for any occasion.
Complete Cooking Process
-
Ingredient Readiness:
Gather biscuits, melt chocolate with butter, and set a bowl of water for the bain‑marie.
-
Flavor Development:
Stir in sugar and vanilla, letting the chocolate melt fully; this is where the scent fills the kitchen.
-
Texture Control:
Layer broken biscuits with ganache, pressing gently to keep crumbs from sliding.
-
Finishing Touches:
Top with a drizzle of glossy chocolate and a pinch of sea salt for contrast.
-
Serving Timing:
Let the cake chill for at least 2 hours; serve chilled for neat slices.
-
Use a silicone spatula for smooth layers
-
Cool the ganache slightly before spreading to avoid soggy biscuits
-
Wrap the cake tightly in cling film to keep moisture in
-
Add a hint of espresso espresso mousse for depth
Pro Tips
I’ve found that letting the cake rest overnight gives the flavors a quiet chance to marry. The next morning, the texture is just right—soft but holding together. It’s a gentle reminder that good things often need patience, and the anticipation of slicing a piece feels like a quiet celebration.
 Desserts
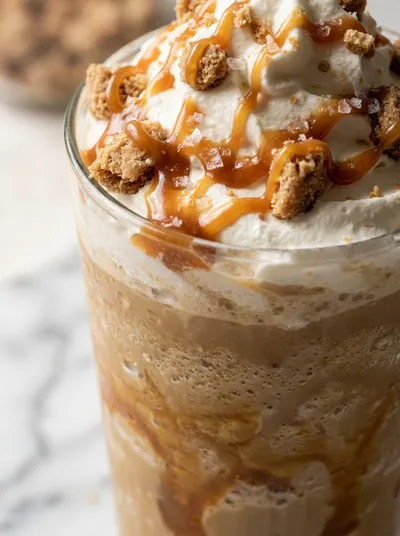
Caramel Ribbon Crunch Frappuccino Recipe
Creamy caramel frappuccino with ribbon swirls and a delightful crunch, ideal for a mid‑day treat.
The essence of the dish:
It’s essentially chocolate, butter, and biscuits assembled into a regal slab. The simple combination yields a rich, silky mouthfeel contrasted with a subtle crunch.
A fun fact or historical angle:
During World War II, British households used leftover biscuits and chocolate ration bars to create improvised desserts, laying the groundwork for today’s biscuit cake.
Flavor or sensory focus:
You’ll first notice the warm aroma of melted chocolate, then the buttery biscuit crumb, and finally a smooth, glossy finish that melts on the tongue.
You Must Know
-
Use room‑temperature butter for easy melting
-
Do not over‑mix the ganache
-
Press biscuits lightly, not hard
Frequently Asked Questions
→ Can I use gluten‑free biscuits?
Yes, substitute with gluten‑free digestive style biscuits; the texture remains similar.
→ How long can I store the cake?
Keep refrigerated in an airtight container for up to 4 days.
→ Can I add nuts?
Chopped toasted almonds or hazelnuts add a pleasant crunch; fold them into the ganache.
→ What if I prefer milk chocolate?
Milk chocolate works fine; just reduce the added sugar slightly.
→ Is this recipe suitable for vegans?
Swap butter for a plant‑based margarine and use dairy‑free chocolate.
→ Can I freeze the cake?
Yes, wrap tightly and freeze for up to 2 months; thaw in the fridge before serving.
Nutrition Facts
per serving
420
Calories
5g
Protein
38g
Carbs
28g
Fat
Taste Profile
Rich chocolate sweetness with a buttery crunch
Ingredient Substitutions
Don't have an ingredient? Try these alternatives
Use the same amount; melt it as you would butter.
Expect a sweeter, milder flavor; reduce added sugar slightly.
Recipe Variations
Try these delicious twists on the original
Spicy Version
Add a pinch of cayenne pepper to the ganache for a gentle heat.
Mediterranean Style
Mix in chopped dried apricots and toasted pistachios for a nutty twist.
Common Mistakes to Avoid
Learn from others' mistakes for perfect results
- Over‑mixing the biscuits makes them turn powdery.
- Not chilling long enough results in a crumbly cake.
- Using cold butter leads to a lumpy ganache.
Meal Prep & Storage
Make Ahead Tips
You can prepare the cake layers a day ahead; keep the assembled cake wrapped and refrigerated.
Leftover Ideas
Reheat gently in the microwave for 10 seconds if you prefer a softer texture before serving.
Perfect Pairings
Serve this with...
Cooking Timeline
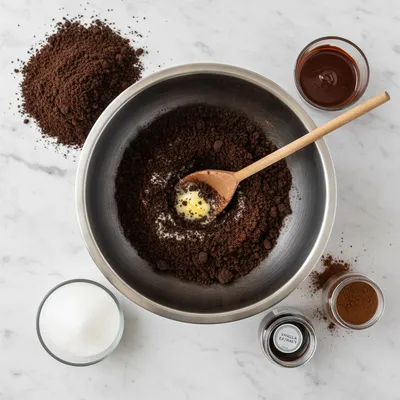
Gather and measure all ingredients.
Melt chocolate and butter over simmering water.
Stir in sugar, cream, and vanilla.
Fold in biscuit pieces gently.
Press mixture into pan and chill.
 Desserts
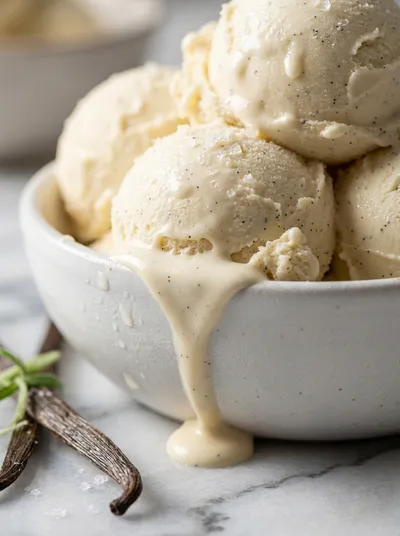
Vanilla Ice Cream – No‑Cook Homemade Treat
No‑cook vanilla ice cream that’s silky, sweet, and ready in minutes—perfect for an easy homemade treat.
Queens Chocolate Biscuit Cake
Indulge in a rich, crumbly Queens Chocolate Biscuit Cake—easy to make, perfect for celebrations, and lovingly layered with chocolate ganache and biscuit crunch.
Timing
Prep Time
15 Minutes
Cook Time
0 Minutes
Total Time
2 Hours 15 Minutes
Recipe Details
Ingredients
Main Ingredients
-
01
400 g dark chocolate, chopped
-
02
200 g butter, cubed
-
03
150 g caster sugar
-
04
300 ml double cream
-
05
1 tsp vanilla extract
-
06
300 g digestive biscuits, broken into pieces
Optional Toppings
-
01
Sea salt flakes
-
02
Shaved chocolate
-
03
Fresh berries
Instructions
Place the chocolate and butter in a heat‑proof bowl over simmering water; stir until smooth and glossy.
Remove from heat, whisk in sugar, cream, and vanilla until fully incorporated.
Fold in the broken biscuits gently, ensuring every piece is coated but not crushed.
Press the mixture into a lined loaf pan, smooth the top, and refrigerate for at least 2 hours.
Once set, drizzle with extra melted chocolate, sprinkle sea salt, and slice with a warm knife.
Notes & Tips
-
1
If the ganache feels too thick, add a tablespoon of warm cream to loosen.
-
2
For a richer flavor, let the chocolate and butter melt together for a few extra minutes.
-
3
Cover the cake tightly to prevent it from absorbing fridge odors.
 Desserts
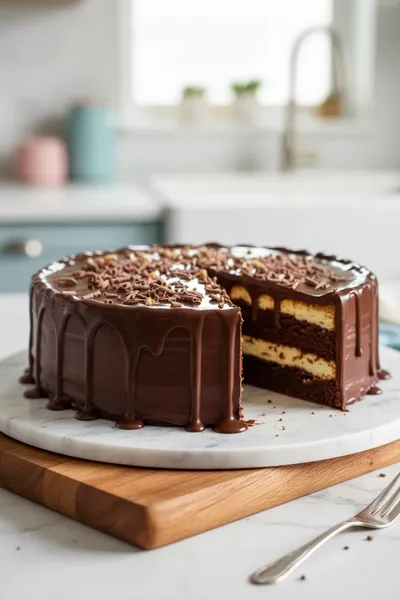
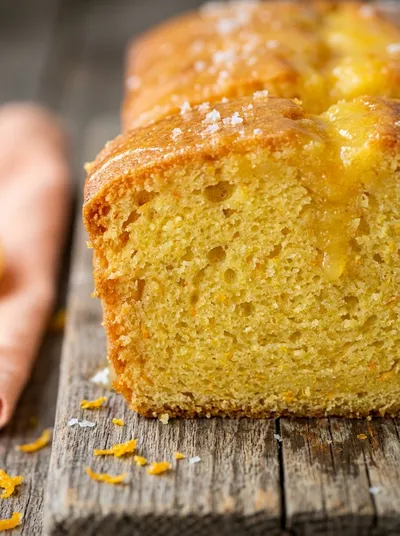
Orange Cake Loaf – Soft & Moist
Soft, moist orange cake loaf with a fragrant citrus crumb, ready in less than an hour.
Tools You'll Need
-
Heat‑proof bowl
-
Saucepan
-
Spatula
-
Loaf pan
-
Knife
-
Plastic wrap
Must-Know Tips
-
Do not over‑mix the biscuits or they become powdery
-
Let the cake chill fully for clean slices
-
Use a warm knife for smoother cutting
Professional Secrets
-
Room‑temperature butter melts evenly, preventing grainy ganache
-
A double boiler prevents scorching the chocolate
-
A light press preserves the biscuit’s airy texture

Recipe by
Sofia☕💖 A morning coffee lover who can’t resist melting chocolate into everything she bakes. Warm smiles and cocoa dreams! 🍩🌷
Get Delicious Recipes Weekly
Join 25,000+ home cooks getting our best recipes straight to their inbox.
Free forever • No spam • Unsubscribe anytime